The post Homemade Pasta Without a Pasta Machine (Easy Hand-Rolled Recipe) appeared first on Julies Apron.
]]>The result? Rustic, tender pasta with incredible flavor that tastes better than anything store-bought.
Why you will love this recipe
- No fancy equipment needed
- Perfect for beginners
- Budget-friendly pantry ingredients
- Customizable shapes and thickness
- Rich, authentic homemade taste
This post may contain affiliate links. Please read my disclosure policy here.
Ingredients for Homemade Pasta Dough
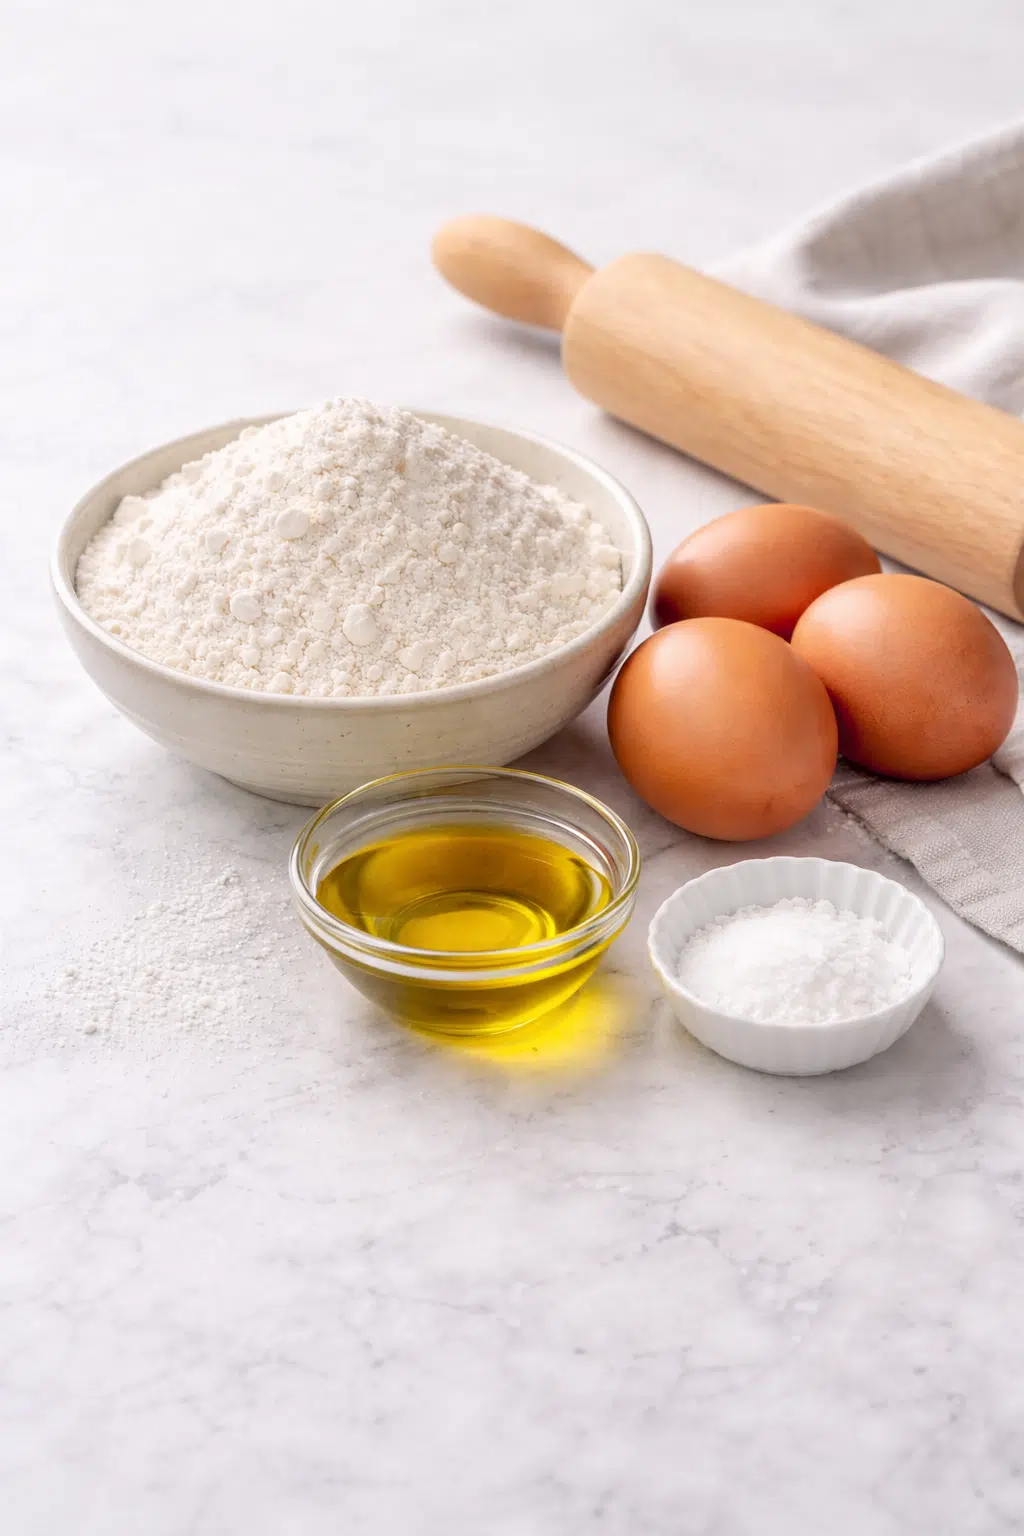
- all-purpose flour
- eggs
- salt
- olive oil (optional)
Watch how easy it is..
How to Make Pasta Without a Pasta Machine (Step-by-Step)
1. Make the Dough
On a clean surface, mound your flour and create a well in the center. Crack the eggs into the well, add salt and a drizzle of olive oil.
Use a fork to gradually mix the flour into the eggs until a shaggy dough forms.
2. Knead the Dough
Knead for about 8–10 minutes until the dough is smooth and elastic. Every flour will react differently, so if the dough is sticky, add a little flour. If too dry, add a tiny splash of water.
3. Let It Rest
Wrap the dough in plastic wrap and let it rest at room temperature for 30 minutes. This relaxes the gluten and makes rolling easier.
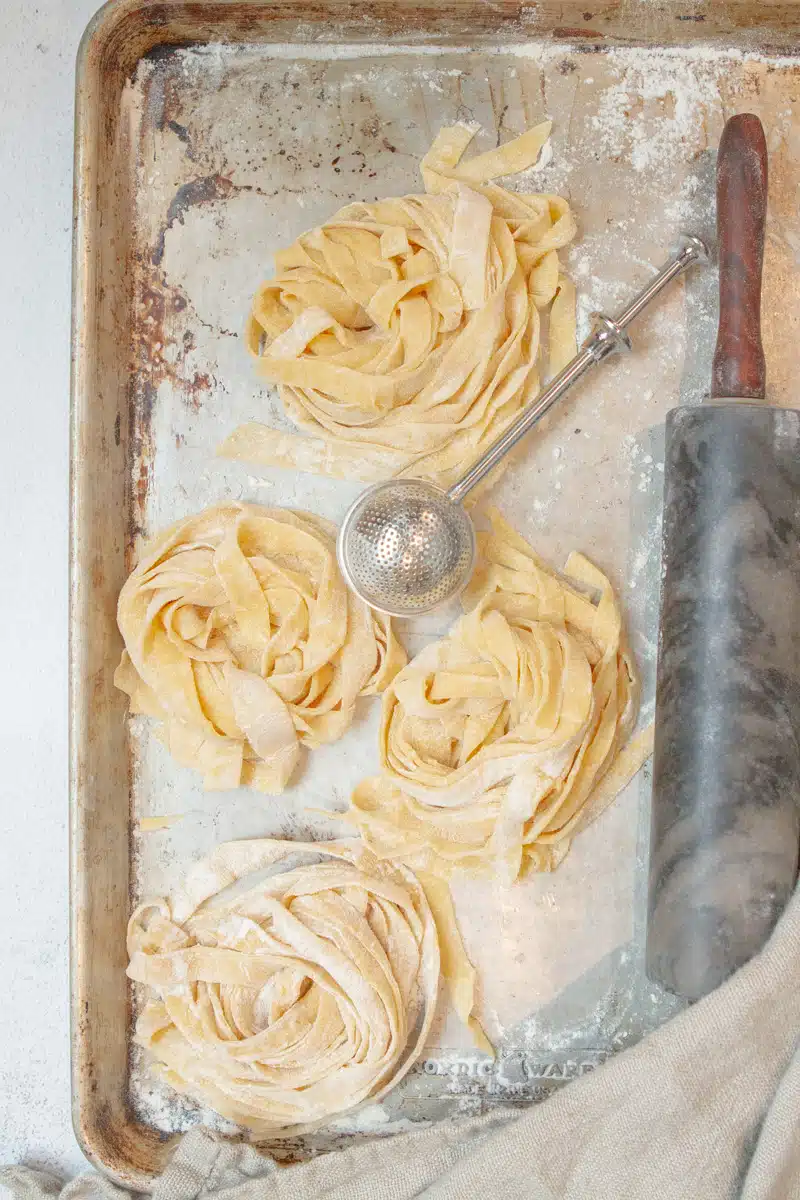
4. Roll the Pasta by Hand
Divide the dough into smaller, more manageable pieces. I do 4 pieces, then using a rolling pin, roll each piece as thin as possible (about 1/16 inch thick).
Tip: Rotate the dough frequently to prevent sticking.
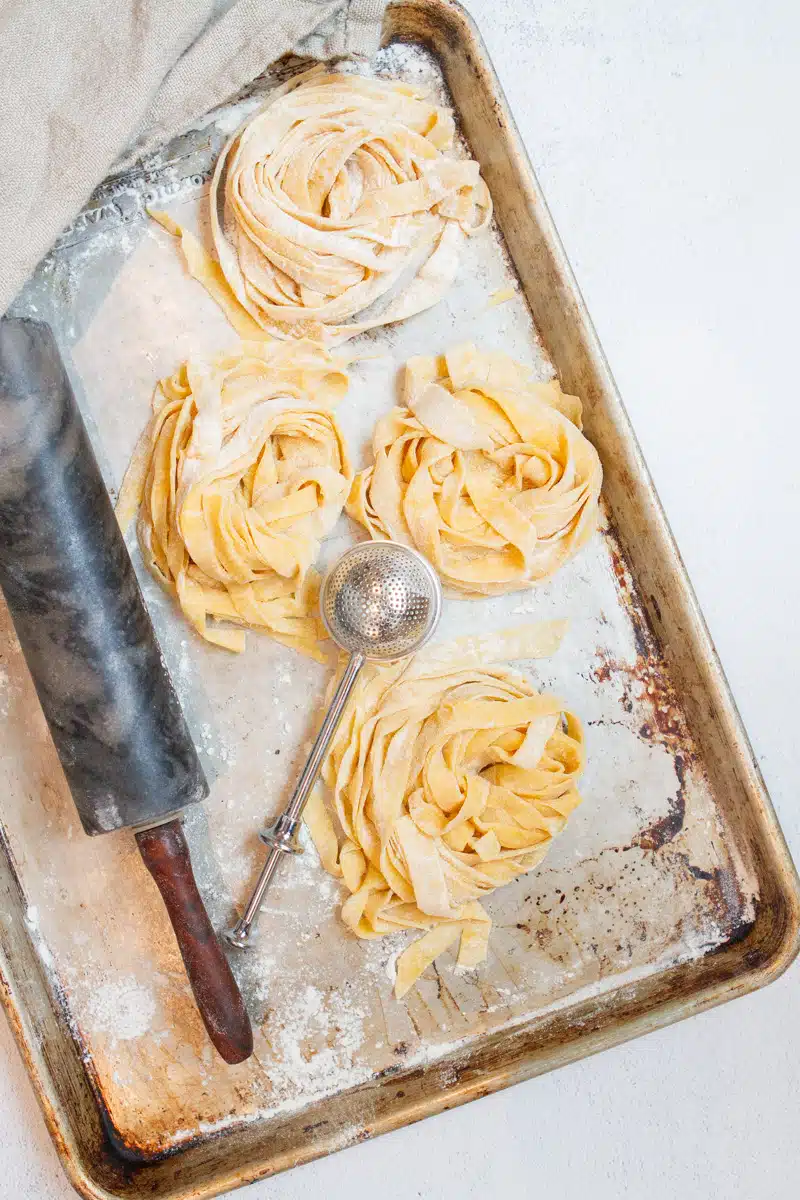
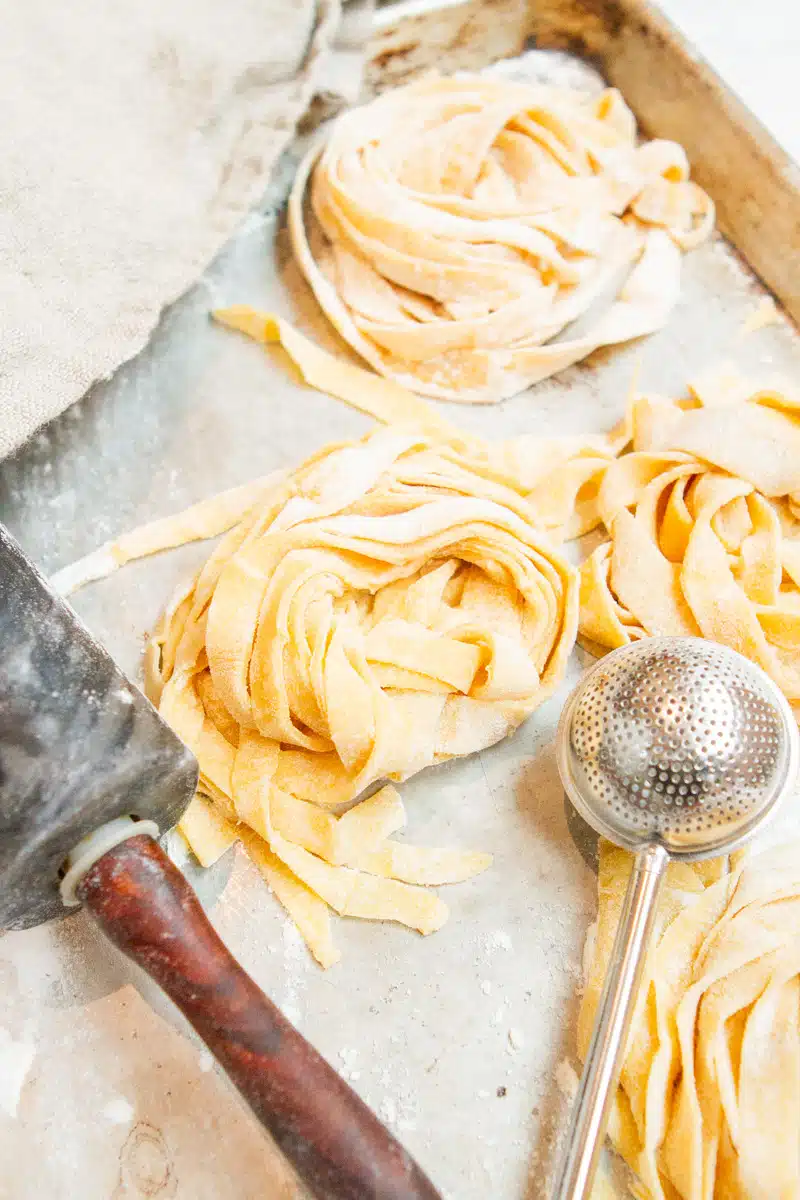
5. Cut Pasta Without a Machine
Lightly flour the sheet, fold it loosely in an accordion style, then cut pasta into uniform strips with a sharp knife. Pasta shapes you can make without a machine:
- Thin = spaghetti
- Medium = fettuccine
- Wide = pappardelle
6. Cook the Pasta
Bring a pot of water to a boil and add a pinch of salt. Add the pasta to boiling salted water and cook for 2–4 minutes until tender. Fresh pasta cooks quickly, so keep an eye on it!
Tips for Rolling Pasta Without a Pasta Maker
- Use a long rolling pin for even pressure
- Roll from the center outward
- Dust lightly with flour to prevent sticking on the counter and the pasta
- Don’t stress about perfect shapes—rustic pasta is part of the charm
Best Sauces for Homemade Pasta
Pair your pasta with:
- Simple garlic butter sauce
- Classic marinara
- Creamy Alfredo
- Olive oil, parmesan, and herbs
Pasta Troubleshooting: Common Mistakes to Avoid
- Skipping the resting time → makes dough hard to roll
- Too much flour → results in dry pasta
- Rolling too thick → pasta becomes chewy
- Overcooking → fresh pasta cooks fast!
Storage Tips
- Fresh (uncooked): Store in fridge for up to 1 day
- Cooked pasta: Keep in airtight container for 3–4 days
- Frozen: Up to 2 months
FAQs About Homemade Pasta Without a Pasta Machine
Can you really make pasta without a pasta machine?
Yes! A rolling pin and knife are all you need to make delicious homemade pasta.
How thin should I roll pasta dough by hand?
Aim for about 1/16 inch thick. You should almost be able to see your hand through it.
Can I make pasta dough ahead of time?
Absolutely. Wrap it tightly and store it in the fridge for up to 24 hours. Or freeze for up to 6 months.
Why is my pasta dough tough?
It likely needs more kneading or resting time. Gluten needs time to relax.
Can I freeze homemade pasta?
Yes! Freeze cut pasta in nests on a tray, then transfer to a bag. Cook from frozen.
If you enjoyed this recipe make sure to leave a 5-star rating. As well as leave a comment if you have any questions or what you enjoyed most. Be sure to tag us on social media #juliesapron or @juliesapron for a chance to be featured on our page. These small gestures mean so much for the success of my blog! Thank you for following along and if you are new here, welcome; I hope you stick around and enjoy all the recipes!

Homemade Pasta Without a Pasta Machine (Easy Hand-Rolled Recipe)
Equipment
- 1 rolling pin
- 1 Sharp Knife
- 1 pot for boiling
Ingredients
- 2 cups flour
- 3 eggs
- ½ teaspoon sea salt
- 1 teaspoon olive oil
Instructions
Mix the Dough: On a clean surface, mound your flour and create a well in the center. Crack the eggs into the well, add salt and olive oil. Use a fork to gradually mix the flour into the eggs until a shaggy dough forms.
Knead the Dough: Knead for about 8–10 minutes until the dough is smooth and elastic. If it’s sticky, add a little flour. If too dry, add a tiny splash of water.
Let It Rest: Wrap the dough and let it rest for 30 minutes. This relaxes the gluten and makes rolling easier.
Roll the Pasta by Hand: Divide the dough into smaller pieces. Using a rolling pin, roll each piece as thin as possible (about 1/16 inch thick).
Cut Pasta Without a Machine: Lightly flour the sheet, fold it loosely, and cut into strips using a sharp knife
Cook the Pasta: Boil in salted water for 2–4 minutes until tender. Fresh pasta cooks quickly, so keep an eye on it!
Video
Notes
- Dough should be soft and smooth. If sticky, add flour 1 tablespoon at a time; if dry, wet your hands and continue kneading.
- Resting the dough for at least 30 minutes is essential for easy rolling—don’t skip this step.
- Roll the dough thin enough to slightly see your hand through for the best texture.
- Fresh pasta cooks quickly (2–4 minutes), so watch closely to avoid overcooking.
- Lightly flour the cut pasta to prevent sticking before cooking.
- Dough can be made ahead and refrigerated for up to 24 hours or frozen after cutting.
- No rolling pin? A bottle works just as well.
The post Homemade Pasta Without a Pasta Machine (Easy Hand-Rolled Recipe) appeared first on Julies Apron.
]]>The post How to Make Homemade Butter in a Mixer (Easy 2-Ingredient Recipe) appeared first on Julies Apron.
]]>If you’ve been searching for:
- how to make butter in a stand mixer
- homemade butter recipe with heavy cream
- easy butter recipe without shaking
…this is the method you’ll want to use.
Why you will love this Homemade Butter Recipe
- Only 2 ingredients
- Faster than the jar method
- No arm workout required
- Creamy, fresh flavor
- Beginner-friendly and foolproof
Ingredients

- 2 cups heavy cream (cold)
- Pinch of sea salt (optional)
🥣 What You Need
- Stand mixer or hand mixer
- Mixing bowl
- Strainer or cheesecloth (optional)
This is the easiest way to make butter from heavy cream without shaking
⏱️ How to Make Homemade Butter in a Mixer (Step-by-Step)
This is the best method for making butter quickly at home.
Step 1: Pour the Cream
Add 2 cups of cold heavy cream to your mixing bowl.

Step 2: Start Mixing
Begin on medium speed and gradually increase speed to the highest.

Step 3: Watch the Stages
The cream will transform in stages:
- Liquid cream
- Whipped cream
- Thick, grainy texture
- Separation into butter + buttermilk
This takes about 3–6 minutes; in some cases, it may take longer. It just depends on your mixer and the speed you mix at.
Step 4: Separate the Buttermilk
Once the butter clumps together, forming butter, stop the mixer and pour out the liquid buttermilk. DONT pour it out, just set aside in the fridge to use next time you make baked goods (you will be so impressed.)

Step 5: Rinse the Butter
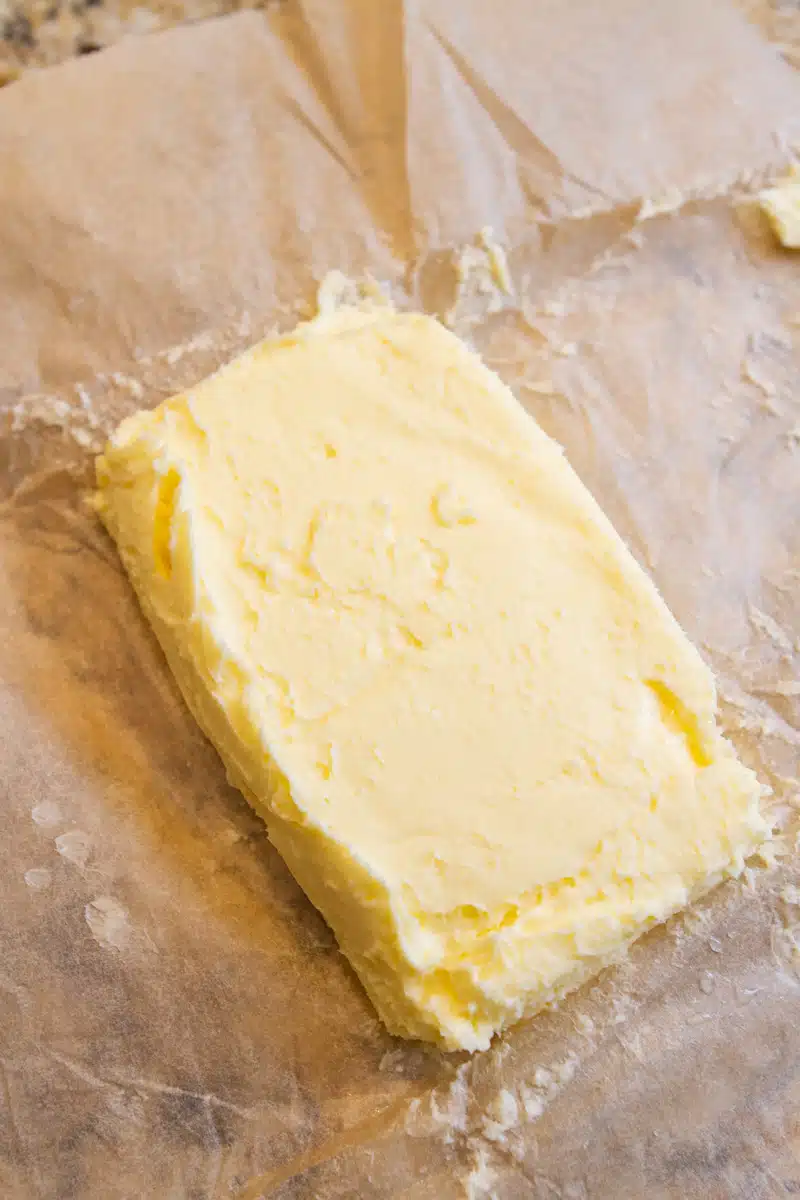
Rinse the clump of butter in a bowl with very cold water. You can add ice, but the water was already freezing my hands. Just make sure your water isn't warm enough that the butter starts melting in your hands. Press gently, working through all the butter to remove any remaining liquid. This helps to preserve the butter and improve the flavor. Wash the butter this way and replace the water once the butter leaves the water clear it is cleansed and ready to enjoy. It took me 3 times to get there.

Step 6: Add Salt
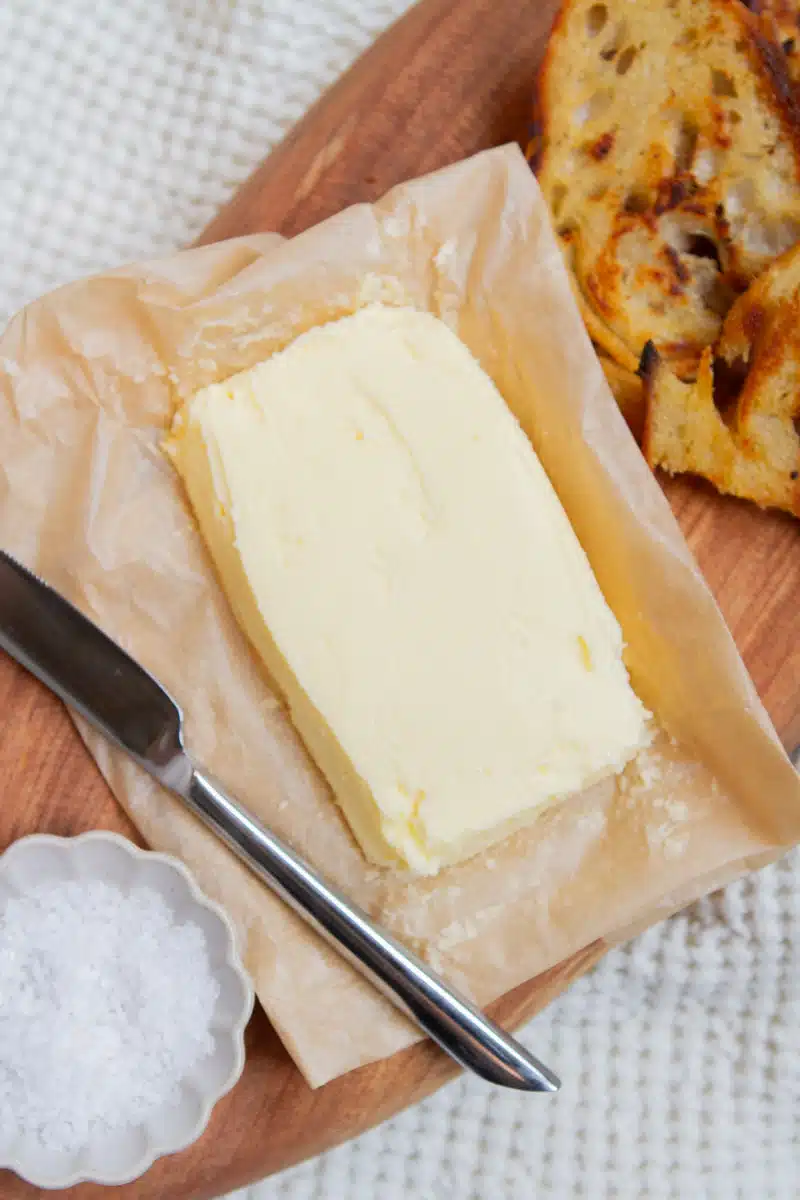
Mix in a pinch of sea salt, I wouldn't skip this step, it add a hint of flavor that is irresistible. If you need butter for baking its best unsalted but for spreading salted butter is best.

Step 7: Store
Transfer to an airtight container and refrigerate.
Storage:
- Fridge: up to 1 week
- Freezer: up to 3 months
How Long Does It Take to Make Butter in a Mixer?
If you’re searching how long to make butter in a stand mixer, here’s what to expect:
- Mixing time: 3–6 minutes
- Total time: 10 minutes or less
Which is much faster than shaking by hand in a jar.
Troubleshooting: Why Your Homemade Butter Isn’t Forming
Problem: It stays whipped cream
Fix: Keep mixing—it just needs more time
Problem: Cream is too warm
Fix: Use cold heavy cream
Problem: Mixer speed is too low
Fix: Increase to medium-high speed
Easy Flavor Variations
Once you’ve mastered the base recipe, try:
- Garlic herb butter
- Honey butter
- Cinnamon butter
- Lemon herb butter
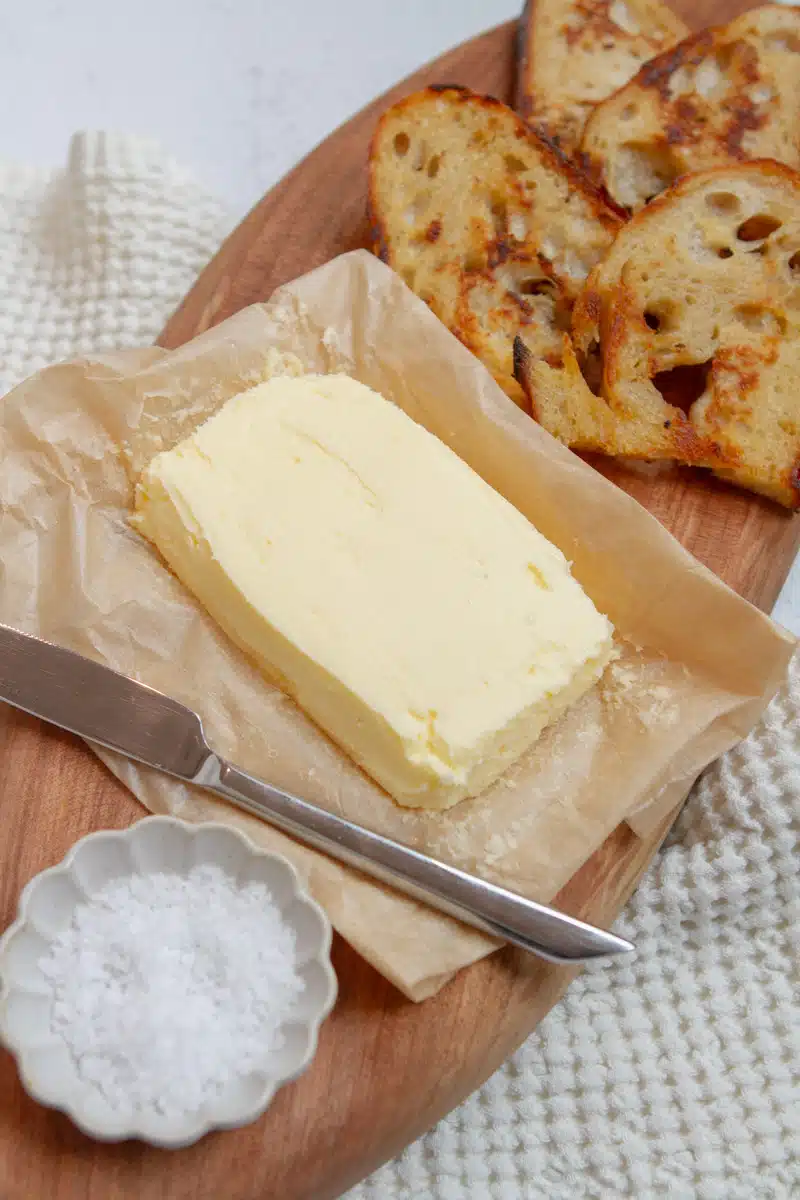
Spread it plain on some fresh Sourdough Bread is my favorite way to enjoy fresh homemade butter.
Ways to Use Homemade Butter
- Spread on toast or bread
- Melt over vegetables
- Use in baking
- Add to pasta or rice
- Top pancakes or waffles
❓ FAQs
Can you make butter with a mixer?
Yes! This is one of the fastest and easiest methods.
Do I need a stand mixer?
No, a hand mixer works just as well. Just depending on the mixer, it may require more mixing time.
What kind of cream should I use?
Use heavy cream or heavy whipping cream for best results.
Why do you rinse homemade butter?
To remove excess buttermilk and extend shelf life.
Pro Tips for Perfect Butter
- Use cold heavy cream
- Don’t overmix once butter forms
- Scrape down the bowl if needed
- Taste and adjust salt after mixing
Making homemade butter in a mixer is one of the quickest and most satisfying kitchen projects. With just two ingredients and a few minutes, you’ll have fresh, creamy butter that tastes better than store-bought.
It’s simple, fast, and perfect for beginners.
If you enjoyed this recipe make sure to leave a 5-star rating. As well as leave a comment if you have any questions or what you enjoyed most. Be sure to tag us on social media #juliesapron or @juliesapron for a chance to be featured on our page. These small gestures mean so much for the success of my blog! Thank you for following along and if you are new here, welcome; I hope you stick around and enjoy all the recipes!

Homemade Butter in a Mixer (2 Ingredients)
Equipment
- 1 electric mixer
Ingredients
- 2 cups Heavy Cream
- sea salt to taste
Instructions
- Add cream to mixing bowl
- Mix on medium speed until butter forms (3–6 minutes)
- Strain buttermilk
- Rinse butter with cold water
- Add salt and store
The post How to Make Homemade Butter in a Mixer (Easy 2-Ingredient Recipe) appeared first on Julies Apron.
]]>The post THAI CHICKEN COCONUT CURRY MEATBALLS (Easy 30-Minute Recipe) appeared first on Julies Apron.
]]>This recipe uses simple, easy-to-find ingredients and can be made entirely in one pan, making cleanup a breeze. It’s not only family-friendly, but also perfect for meal prep, so you can enjoy a delicious, satisfying dinner any night of the week. Whether you’re new to Thai cooking or a seasoned fan, these Thai chicken coconut curry meatballs are a quick, flavorful way to bring restaurant-quality flavors to your dinner table.

This post may contain affiliate links. Please read my disclosure policy here.
Why You’ll Love These Thai Coconut Curry Meatballs
- Ready in 30 minutes
- Bold Thai flavors
- One-pan dinner option
- Meal prep friendly
- Gluten-free adaptable
Ingredients you will need
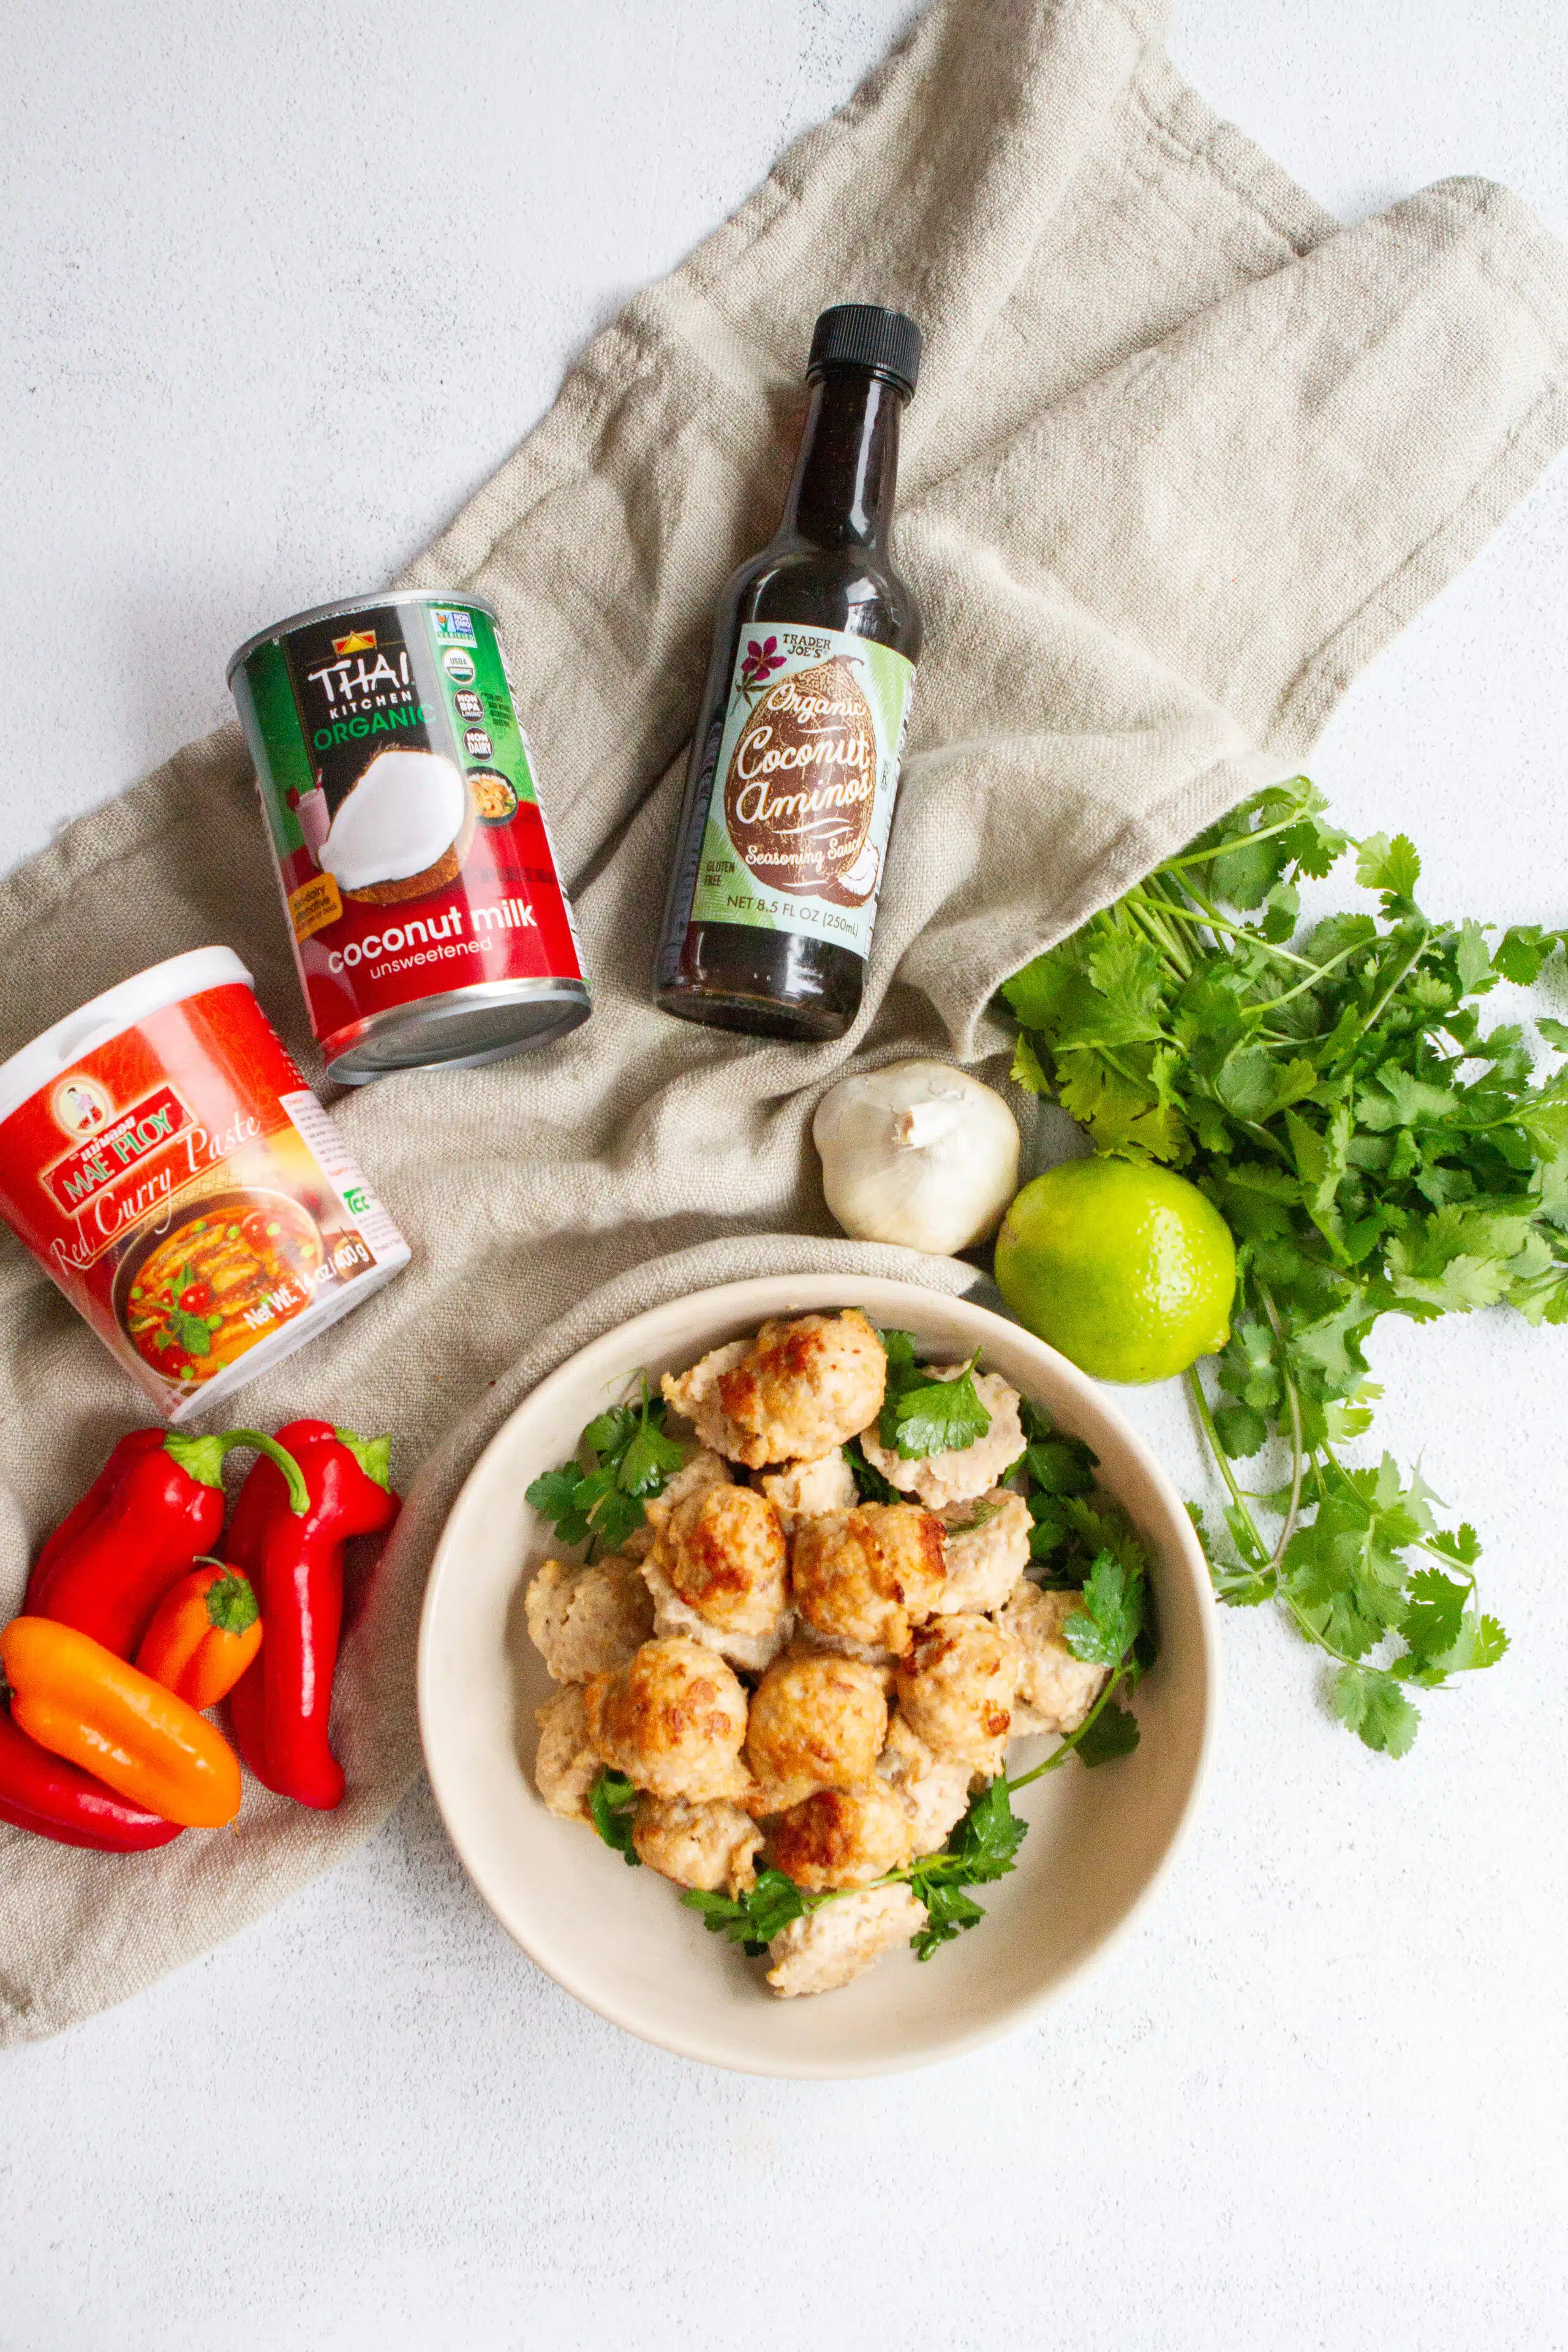
Coconut Curry Sauce
- Curry Paste
Curry paste provides the main flavor of the dish, adding heat, aromatics, and the signature Thai curry taste. - Coconut Milk
Coconut milk creates the rich, creamy base of the sauce and balances the spice from the curry paste. - Soy Sauce or Coconut Aminos
Soy sauce or coconut aminos adds saltiness and umami, enhancing the overall depth of flavor. - Garlic
Garlic adds a savory, aromatic base that builds flavor in both the meatballs and the curry sauce. - Bell Peppers
Bell peppers add natural sweetness, color, and a slight crunch that balances the creamy sauce. - White Rice
White rice serves as the perfect base, soaking up the flavorful coconut curry sauce. - Cilantro
Cilantro adds a fresh, bright herbal flavor that lightens the rich curry. - Lime
Lime juice adds acidity and brightness, helping balance the creamy and savory flavors of the dish.
See recipe card for quantities.
Substitutions
- Coconut aminos for gluten-free or soy-free
- Ground turkey as a lower-fat alternative instead of ground chicken
- Lite coconut milk for a lighter sauce
How to Make Thai Coconut Curry Meatballs

- Prepare the meatball mixture: In a large bowl, combine ground chicken meat, onion, breadcrumbs, egg, salt, and pepper. Mix gently—don’t overwork the meat.

- Shape and cook the meatballs (pan-fry or bake): Roll into small meatballs (about 1–1.5 inches). Heat oil in a skillet over medium heat and cook until browned on all sides and mostly cooked through. Remove and set aside.

- Make the coconut curry sauce: In the same pan, add curry paste and cook for 1–2 minutes until fragrant. Pour in coconut milk, soy sauce, and garlic. Stir well to combine.

- Sauté veggies: Cut bell peppers and carrots into long strips and sauté until soft.
5. Simmer, Garnish and Serve: Return the meatballs to the pan and simmer for 8–10 minutes until fully cooked and the sauce thickens slightly. Add lime juice, taste, and adjust seasoning. Garnish with fresh cilantro and serve warm.
Tips for the Best Coconut Curry Meatballs
- Toast the curry paste before adding liquid for deeper flavor
- Use full-fat coconut milk for a rich, creamy texture
- Don’t overmix the ground meat for the meatballs—that way they’ll stay tender
- Taste and adjust the sauce (lime, salt, spice)

What to Serve with Thai Coconut Curry Meatballs
These meatballs pair perfectly with:
- Steamed rice
- Yakisoba noodles
- Cauliflower rice (low-carb option)
- Stir-fried vegetables
Storage and Meal Prep
These Thai chicken coconut curry meatballs store well, making them great for leftovers and meal prep.
Fridge
Store the meatballs and sauce in an airtight container in the refrigerator for 3–4 days. The flavors often deepen overnight, making leftovers even more delicious.
Freezer
You can freeze the meatballs in the coconut curry sauce for 2–3 months. Let the dish cool completely, then transfer it to a freezer-safe container or bag. For best results, freeze in portion-sized servings so it’s easy to reheat later.
How to Reheat
From the Refrigerator
Reheat the meatballs and sauce in a saucepan over medium-low heat, stirring occasionally until warmed through. If the sauce has thickened, add a splash of coconut milk or water to loosen it.
You can also microwave individual portions in 30–60 second intervals, stirring between each interval until hot.
From Frozen
For best texture, thaw the curry overnight in the refrigerator. Reheat gently on the stovetop over medium-low heat, stirring occasionally until hot.
If reheating directly from frozen, place the curry in a saucepan with a small splash of water or coconut milk and warm it over low heat, stirring frequently as it thaws and heats through.
Tip: Cook fresh rice when reheating so the dish tastes freshly made.

Baked vs Pan-Fried Meatballs
| Method | Pros | Cons |
|---|---|---|
| Baking | easier, less oil | less browning |
| Pan frying | crispy exterior | more effort |
Recommended Equipment
You don’t need any special tools to make these Thai chicken coconut curry meatballs, but a few basic kitchen items will make the process easier.
- Large Mixing Bowl
A mixing bowl is useful for combining the ground chicken, seasonings, and other meatball ingredients evenly. - Measuring Cups and Spoons
Accurate measurements help balance the flavors in the curry sauce and ensure the meatball mixture has the right texture. - Large Skillet or Sauté Pan
A wide skillet is ideal for browning the meatballs and simmering them in the coconut curry sauce. - Baking Sheet (Optional)
If you prefer to bake the meatballs instead of pan-frying them, a baking sheet lined with parchment paper works well. - Wooden Spoon or Silicone Spatula
These tools make it easy to stir the curry sauce and gently move the meatballs without breaking them. - Rice Cooker or Saucepan
Use a rice cooker or a small saucepan to prepare the white rice that will be served with the curry meatballs. - Microplane or Zester (Optional)
A microplane is helpful for grating fresh garlic or ginger quickly and evenly, which enhances the flavor of the dish.
How to Make This Recipe Healthier
If you want a lighter version of Thai chicken coconut curry meatballs, there are a few easy swaps you can make without sacrificing flavor.
Use Lite Coconut Milk
Lite coconut milk contains less fat than full-fat coconut milk while still providing the creamy texture and coconut flavor the sauce needs.
Bake Instead of Fry
Baking the meatballs instead of pan-frying reduces the amount of added oil while still producing tender, flavorful meatballs.
Serve with Cauliflower Rice
Cauliflower rice is a low-carb alternative to traditional rice and adds extra vegetables to the meal while still soaking up the curry sauce.
Use Whole-Grain Rice
Brown rice or other whole grains like quinoa provide more fiber and nutrients than white rice, making the dish more filling and balanced.
Frequently Asked Questions
How to Keep Chicken Meatballs Juicy: Start by using breadcrumbs and egg. Don’t overmix the ground meat. Use dark meat, such as chicken thighs, and don't overcook. Cook until it reaches 165F.
Related
Looking for other recipes like this? Try these:


If you enjoyed this recipe make sure to leave a 5-star rating. As well as leave a comment if you have any questions or what you enjoyed most. Be sure to tag us on social media #juliesapron or @juliesapron for a chance to be featured on our page. These small gestures mean so much for the success of my blog! Thank you for following along and if you are new here, welcome; I hope you stick around and enjoy all the recipes!

Thai Coconut Curry Meatballs
Equipment
- large mixing bowl
- measuring cups and spoons
- Large Skillet or Sauté Pan
- Baking Sheet (Optional)
- Wooden Spoon or Silicone Spatula
- Rice Cooker
- Microplane or Zester
Ingredients
- 20 meatballs Ground Chicken Meatballs
- 1 lrg red bell pepper
- 2 lrg carrots
- 4 cups cooked white rice
- 3 tablespoon cilantro
- 1-2 lime
Coconut curry sauce:
- 2-3 tablespoon red curry paste
- 13 oz coconut milk
- 1 tablespoon soy sauce
- 3 cloves garlic
Instructions
- Prepare the meatball mixture: In a large bowl, combine ground chicken meat, onion, breadcrumbs, egg, salt, and pepper. Mix gently—don’t overwork the meat.

- Shape and cook the meatballs (pan-fry or bake): Roll into small meatballs (about 1–1.5 inches). Heat oil in a skillet over medium heat and cook until browned on all sides and mostly cooked through. Remove and set aside.

- Make the coconut curry sauce: In the same pan, add curry paste and cook for 1–2 minutes until fragrant. Pour in coconut milk, soy sauce, and garlic. Stir well to combine.

- Sauté veggies: Cut bell peppers and carrots into long strips and sauté until soft.

- Simmer, Garnish, And Serve: Return The Meatballs To The Pan And Simmer For 8–10 Minutes, Until Fully Cooked And The Sauce Has Thickened slightly. Add lime juice, taste, and adjust seasoning. Garnish with fresh cilantro and serve warm.

Video
Notes
- Use full-fat coconut milk for the creamiest, richest sauce. Light coconut milk will make the sauce thinner.
- Don’t overmix the meatball mixture—this keeps the meatballs tender and juicy.
- Browning the meatballs first adds extra flavor, but you can bake them for an easier option.
🌶️ Spice Level Adjustments
- For a milder flavor, use 1–2 tablespoons of curry paste and add more coconut milk.
- For more heat, add extra curry paste or a pinch of red pepper flakes.
🔄 Ingredient Substitutions
- Swap ground chicken with pork, turkey, or beef.
- Use gluten-free breadcrumbs or almond flour if needed.
🥦 Add-Ins & Variations
- Stir in veggies like spinach, bell peppers, or carrots for extra nutrition.
- Make it low-carb by serving with cauliflower rice.
❄️ Storage & Reheating
- Store leftovers in the fridge for up to 4 days.
- Freeze for up to 3 months in an airtight container.
- Reheat gently on the stove or microwave with a splash of coconut milk or water to loosen the sauce.
🍚 Serving Suggestions
- Best served with jasmine rice, rice noodles, or steamed vegetables.
- Garnish with fresh cilantro, basil, and lime wedges for the best flavor.
The post THAI CHICKEN COCONUT CURRY MEATBALLS (Easy 30-Minute Recipe) appeared first on Julies Apron.
]]>The post CREAMY MUSHROOM SOUP appeared first on Julies Apron.
]]>
Mushroom soup is most popular during the fall and winter months, when people are searching for cozy, comforting meals and easy soup recipes. With its rich flavor, versatility, and simple ingredients, mushroom soup remains a go to recipe throughout the colder seasons.
You know we love our mushrooms! Foraging every fall for these flavorful and nutrient-dense treats. If you are a mushroom entusiast like us make sure to make our LION'S MANE CRAB CAKES, my favorite mushroom crab cake recipe!
Why you will love this recipe
This creamy mushroom soup keeps things simple while still delivering big flavor.
- Made with everyday pantry staples
- No specialty ingredients required
- A true mushroom soup without flour
- No wine needed — perfect for family-friendly cooking
- One-pot recipe
- Budget-friendly
It’s the kind of recipe you can rely on when you want something homemade but don’t want to spend hours in the kitchen.
Ingredients
- Yellow onion
- Garlic
- Mushrooms, prefered wild mushrooms such as Chantarells
- Carrot
- Chicken Broth
- Gold Yukon Potaotes
- Heavy Cream
- Dill
- Seasonings
See recipe card for quantities.
Equipment Recommendations
You don’t need anything fancy to make this soup, but having the right tools makes the process easier and improves texture.
- Large soup pot or Dutch oven
- Cutting board
- Sharp knife
- Wooden spoon
- Ladle
- Immersion blender (optional for creamy texture)
If you don’t have an immersion blender, a standard blender works just fine — just blend carefully in batches.

How to Make Creamy Mushroom Soup Step-by-Step
This soup comes together easily in just one pot.
Step 1: Sauté the aromatics
Cook onions and garlic in butter until soft and fragrant. Add in the chopped carrots as well and saute until soft.
Step 2: Add the mushrooms
Sauté until tender and lightly golden to bring out their natural richness.
Step 3: Pour in the broth
Simmer to develop flavor and create the soup base. Because this is a mushroom soup without flour, the creaminess comes naturally from the mushrooms and optional blending — no roux required.
Step 4: Add the potatoes
Peel and chop gold Yukon potatoes into 1-inch cubes and add into your soup.
Step 5: Add the cream and herbs
Stir in cream at the end for that signature silky finish and garnish with fresh chopped dill. Do a taste test and adjust the seasoning to your preference.
Easy Variations Using Pantry Ingredients
This recipe is flexible and easy to customize:
- Dairy-Free → Swap cream for coconut milk
- Heartier Option → Add diced potatoes
- Protein Boost → Add shredded chicken
- Herb Swap → Use thyme or parsley
These small tweaks allow you to make this soup your own while still keeping it simple.
Storage Guidelines
This creamy mushroom soup stores beautifully, making it ideal for leftovers or meal prep.
Refrigerator:
Store in an airtight container for up to 4 days.
Freezer:
Freeze for up to 3 months (freeze before adding cream for best texture).
Reheating:
Warm gently on the stovetop over low heat, stirring occasionally.
If frozen without cream, add fresh cream after reheating.

Tips for the Best Creamy Texture
Want that perfect balance of richness and comfort? These simple tips help:
- Always add cream at the end to avoid curdling
- Don’t overcrowd mushrooms — this helps them brown instead of steam
- Use broth to balance the richness of the cream
- Blend only part of the soup for a creamy yet textured result
FAQ: Creamy Mushroom Soup with Simple Ingredients
Yes! You can substitute heavy cream with milk, half-and-half, or even coconut milk for a dairy-free version. Blending part of the soup also helps create a naturally creamy texture.
White mushrooms, cremini, and wild mushrooms like chanterelles all work well. Using a mix can add deeper flavor to your creamy mushroom soup.
Yes — but for best results, freeze it before adding cream. Add fresh cream when reheating to prevent separation.
Stored in an airtight container, creamy mushroom soup will last up to 4 days in the refrigerator.
Yes! Mushroom soup is packed with nutrients and can be made lighter by using milk instead of heavy cream or adding extra vegetables.

Conclusion: Creamy Comfort Without the Fuss
Simple, cozy, and full of flavor — this is a recipe you’ll come back to again and again. This no wine creamy mushroom soup proves that comfort food doesn’t need complicated ingredients. As a naturally mushroom soup without flour, it delivers rich texture and deep flavor using simple pantry staples.
This creamy mushroom soup with simple ingredients proves that homemade comfort food doesn’t have to be complicated. With just a few kitchen staples and one pot, you can create a rich, satisfying soup that’s perfect for chilly evenings, easy dinners, or whenever you need something warm and nourishing.
If you enjoyed this recipe make sure to leave a 5-star rating. As well as leave a comment if you have any questions or what you enjoyed most. Be sure to tag us on social media #juliesapron or @juliesapron for a chance to be featured on our page. These small gestures mean so much for the success of my blog! Thank you for following along and if you are new here, welcome; I hope you stick around and enjoy all the recipes!

Creamy Mushroom Soup
Equipment
- 1 Large soup pot or Dutch oven
- 1 Cutting Board
- 1 spoon Ladle
- 1 immersion blender
- 1 Sharp Knife
Ingredients
- 1 Yellow onion
- 1 lb Mushrooms Preferably Chantrelles
- 1 lrg Carrot
- 8 Med Yukon Gold Potatoes
- 8-10 cups Chicken Broth
- ½ cup Heavy Cream
- 2 tablespoon Dill chopped
- salt and pepper to taste
Instructions
- Step 1: Sauté the aromaticsCook onions and garlic in butter until soft and fragrant. Add in the chopped carrots as well and saute until soft.
- Step 2: Add the mushroomsSauté until tender and lightly golden to bring out their natural richness.
- Step 3: Pour in the brothSimmer to develop flavor and create the soup base. Because this is a mushroom soup without flour, the creaminess comes naturally from the mushrooms and optional blending — no roux required.
- Step 4: Add the potatoes Peel and chop your potatoes into 1-inch cubes and add into your soup.
- Step 5: Add the cream and herbsStir in cream at the end for that signature silky finish and garnish with fresh chopped dill. Do a taste test and adjust the seasoning to your preference.
The post CREAMY MUSHROOM SOUP appeared first on Julies Apron.
]]>The post CRUNCHY BEET SLAW SALAD appeared first on Julies Apron.
]]>
This post may contain affiliate links. Please read my disclosure policy here.
Why you will love this recipe
- Nutrient-packed: Beets and cabbage are superfoods, rich in antioxidants and vitamins.
- Quick & easy: Minimal prep time for a delicious payoff.
- Versatile: Perfect as a side dish, salad, or in a sandwich.
- Customizable: Easily adaptable to various diets and preferences.
Ingredients needed to make Beet Coleslaw Salad
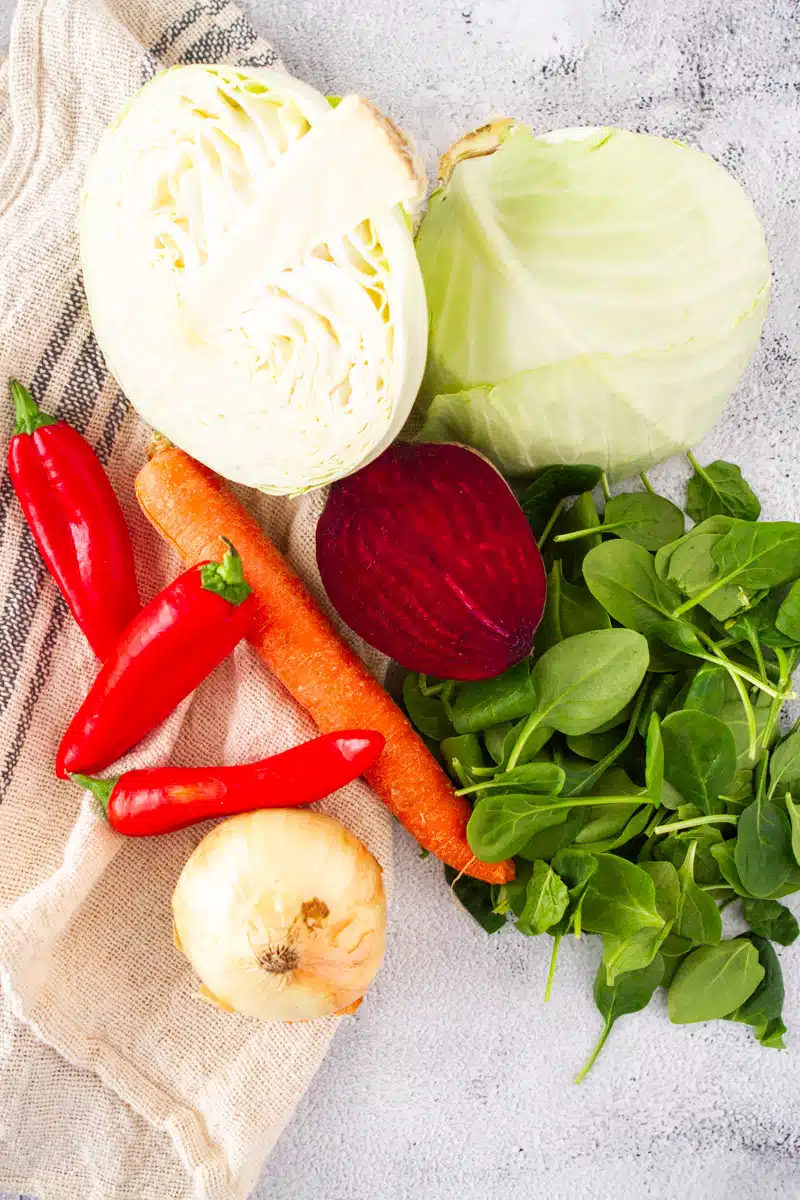
- Green Cabbage
- Beet
- Spinach
- Sweet Red Pepper
- Carrot
- Sweet onion
- Dressing:
- Olive Oil
- White vinager
- Salt and Pepper
See recipe card for quantities.
Equipment Recommendation
- Mandolin Slicer: A must in any kitchen invest in a good quality one and you won't have to ever replace it. Perfect for salads, and meal prep.
- Cutting Board: I love composite wood cutting boards. They don't absorb liquid like some wooden boards do and are better than plastic so you can avoid those harmful chemicals or plastic shavings in your food.
- Mixing Bowl: Mixing bowls with lids is a game changer from food prep to storage to serving all in one bowl.
- Tongs or salad claws: Salad claws make it so simple to toss and mix a salad. You can also get metal salad claws that can double for shredding meat.
- Measuring cup
How to make Raw Beet and Carrot Salad
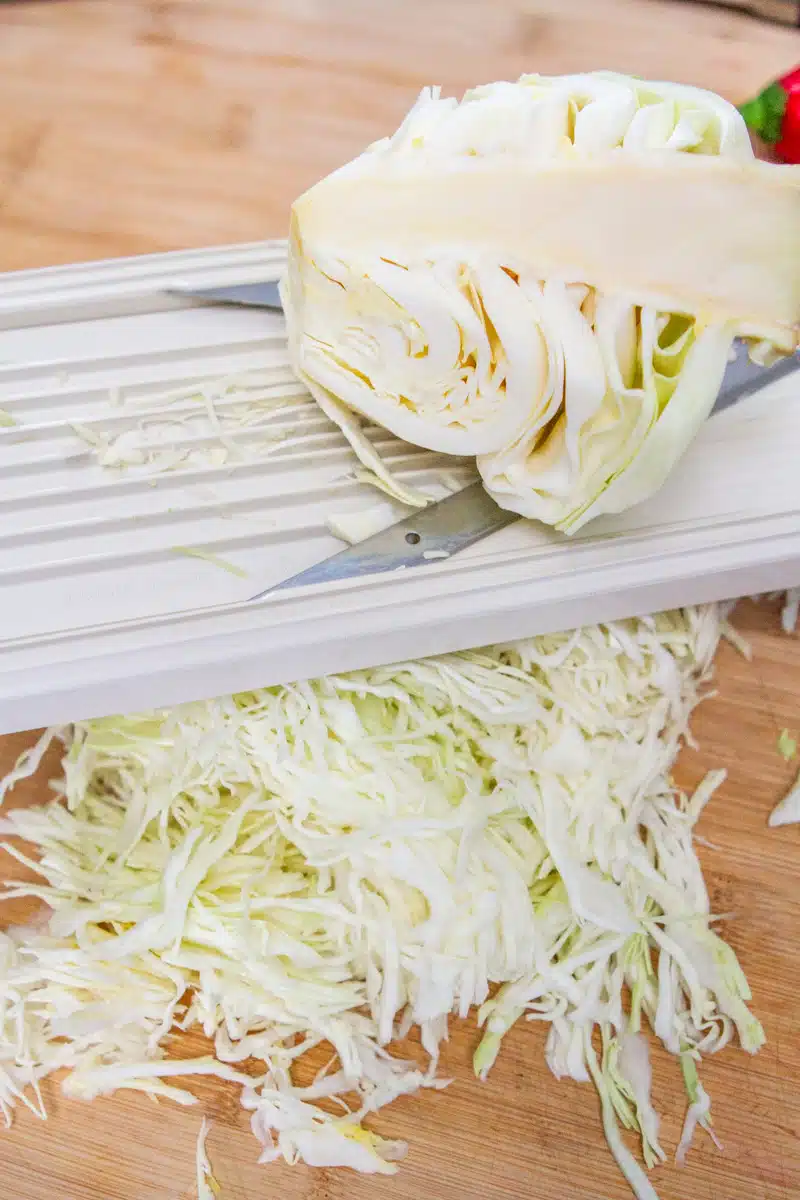
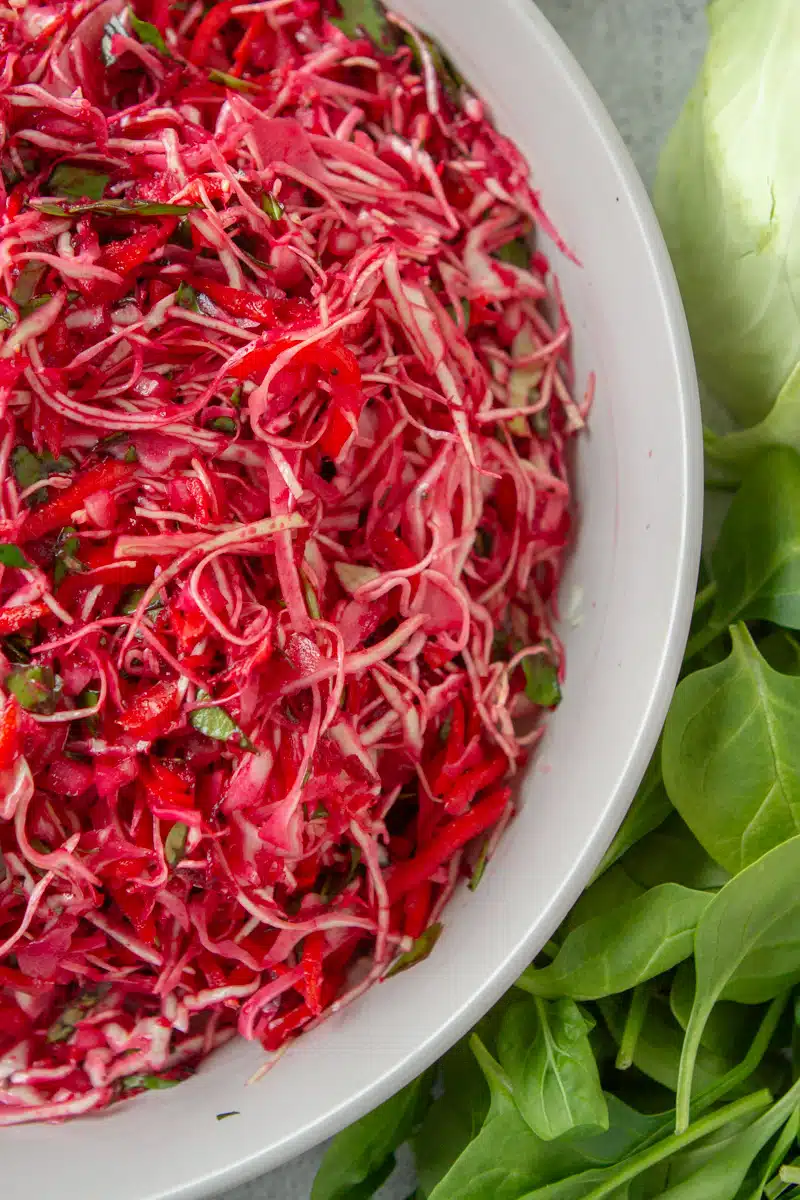
- Prep the veggies: Start by peeling and grating ½ a large beet and 1 large carrot. Then, finely shred ½ a large firm cabbage using a mandolin slicer. Using a sharp knife, slice 3 small or 1 large sweet red pepper and finely dice 1 small sweet onion. Next, chop the 1 cup of spinach into smaller pieces.
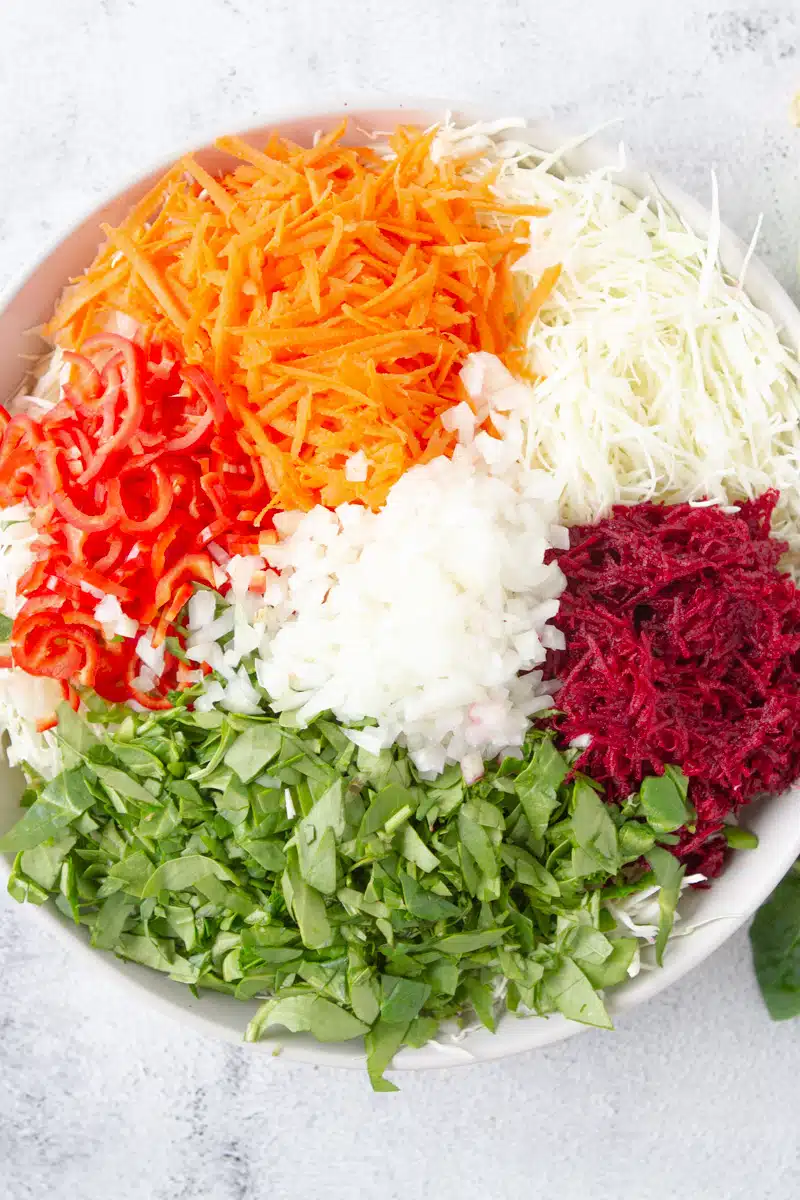
- Add all the chopped, grated, and sliced vegetables into a bowl. If you are planning to serve at a later time, cover with an air-tight lid and refrigerate for up to 3 days. This is a great salad option for meal prep.

- Make the dressing: In a measuring cup to reduce dishes, add ¼ cup olive oil, 1 tablespoon of white vinegar, salt, and pepper to taste I used 2 teaspoon of salt and ½ teaspoon of black pepper. Using a fork, whisk together. Set aside until ready to serve salad. Then drizzle over salad and toss to coat cabbage and vegetables.

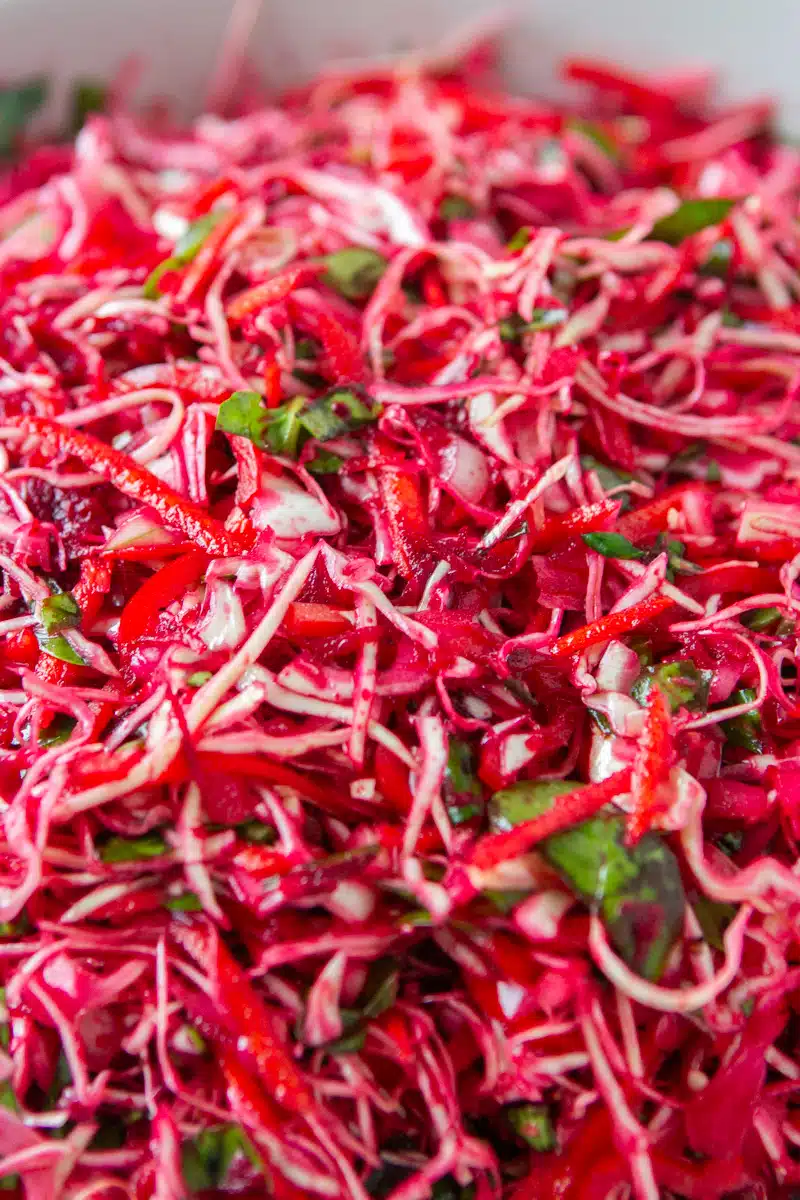
- Mix Salad: When ready to serve, pour the dressing over the shredded vegetables. Using tongs or salad claws, toss well to ensure everything is evenly coated. To maintain optimal freshness, mix right before ready to serve.
Enjoy this vibrant raw beet coleslaw salad as a satisfying side dish or a meal on its own. Just add some protien on top to make it more filling such as grilled chicken or steak. Its unique flavors and eye-catching colors are sure to impress your guests and family!
Substitutions and Variations
Want a creamy dressing? Add in a tablespoon of mayonnaise or plain yogurt into the dressing.
Nutty flavor Add sunflower seeds or chopped walnut pieces.
Citrusy twist: Add a splash of lemon juice or zest to the dressing for a zesty flavor.
Spicy kick: Include a pinch of cayenne pepper in the dressing.
Storage
Refrigerator: Store chopped and shredded vegetables in an airtight container for up to 3 days. The flavors will deepen as it sits, but the texture may soften slightly.
Freezing: This salad is not ideal for freezing as the fresh vegetables lose their crunch when thawed.
Top Tip
For the freshest and crunchiest slaw, use raw, firm vegetables and a sharp grater. If the beets are particularly juicy, pat them dry with a paper towel before mixing to prevent the dressing from becoming watery.
FAQ
Yes! If you’re short on time, pre-cooked beets are a great alternative. Just ensure they’re firm enough to shred or dice.
Yes, this beet coleslaw can be prepared up to 3 days in advance. Just store in the refrigerator and add the dressing before serving.
Need something to serve with this Beet Salad?
Try our Stovetop Braised Short Ribs they would pair amazingly with this salad along with Boursin Mashed Potatoes. If you prefer Chicken try this salad with our Dutch oven Chicken Quarters or our Honey Mustard Chicken Drumsticks. This salad compliments almost any dish.
If you enjoyed this recipe make sure to leave a 5-star rating. As well as leave a comment if you have any questions or what you enjoyed most. Be sure to tag us on social media #juliesapron or @juliesapron for a chance to be featured on our page. These small gestures mean so much for the success of my blog! Thank you for following along and if you are new here, welcome; I hope you stick around and enjoy all the recipes!

Crunchy Beet Slaw Salad
Equipment
- 1 mandolin slicer
- 1 Cutting Board
- 1 Sharp Knife
- 1 large mixing bowl
- 1 tongs or salad claws
- 1 measuring cup
Ingredients
- ½ large Firm green cabbage head
- 1 small Beet
- 1 cup Spinach
- 1 Red Bell pepper
- 1 large Carrot
- 1 small sweet onion
Simple Salad Dressing:
- ¼ cup Olive oil
- 1 tablespoon White Vinegar
- Salt and pepper to taste
Instructions
- Prep the veggies: Start by peeling and grating ½ a large beet and 1 large carrot. Then, finely shred ½ a large firm cabbage using a mandolin slicer. Using a sharp knife, slice 3 small or 1 large sweet red pepper and finely dice 1 small sweet onion. Next, chop the 1 cup of spinach into smaller pieces.
- Add all the chopped, grated, and sliced vegetables into a bowl. If you are planning to serve at a later time, cover with an air-tight lid and refrigerate for up to 3 days. This is a great salad option for meal prep.
- Make the dressing: In a measuring cup to reduce dishes, add ¼ cup olive oil, 1 tablespoon of white vinegar, salt, and pepper to taste I used 2 teaspoon of salt and ½ teaspoon of black pepper. Using a fork, whisk together. Set aside until ready to serve salad. Then drizzle over salad and toss to coat cabbage and vegetables.
- Mix Salad: When ready to serve, pour the dressing over the shredded vegetables. Using tongs or salad claws, toss well to ensure everything is evenly coated. To maintain optimal freshness, mix right before ready to serve.
Notes
Substitutions and Variations
Want a creamy dressing? Add a tablespoon of mayonnaise or plain yogurt to the dressing. Nutty flavor Add sunflower seeds or chopped walnut pieces. Citrusy twist: Add a splash of lemon juice or zest to the dressing for a zesty flavor. Spicy kick: Include a pinch of cayenne pepper in the dressing.The post CRUNCHY BEET SLAW SALAD appeared first on Julies Apron.
]]>The post LEMON GINGER HONEY TEA appeared first on Julies Apron.
]]>
This post may contain affiliate links. Please read my disclosure policy here.
Have you noticed most cold medications have lemon and honey in them? There are natural components in each ingredient that help fight cold symptoms. Why not combine these ingredients for the ultimate comforting tea to sip on through a cold and soothe those symptoms? Also, make the immunity shots even more
[feast_advanced_jump_to]Why you will love this recipe
- Easy to Make: Just a handful of ingredients and 10 minutes are all you need.
- All-Natural: No artificial flavors or additives.
- Customizable: Adjust the ingredients to suit your taste and dietary preferences.
Ingredients

- Organic Lemons- Help with immune system support with Vitamin C and antioxidants.
- Organic Ginger- Has Antimicrobial Properties that help fight and kill bacteria.
- Raw Honey- Look for local raw honey in your area for the best results. Raw Honey has an abundant list of health benefits such as antimicrobial, anti-inflammatory, and antioxidant properties. Honey is often used to treat sore throats and coughs. Hence why, many grocery stores' cold and flu medications include honey.
*Organic ingredients are optional but highly recommended.
See the recipe card for quantities.
Equipment Recommendation
- A good blender- You want something strong that will produce a even and smooth texture. I have had great results using this Ninja Blender its effective without breaking the bank.
- Cutting board- I like using either a wood or a composite cutting board. Try to avoid plastic cutting boards you don't want plastic particles in your food.
- Sharp knife- A sharp knife is worth more than gold in a kitchen.
- Glass storage jar- Glass will hold the concentrate more stable and fresh rather than plastic.
Instructions

- Step 1: Peel lemon and ginger
- Using a sharp knife, cut off the skin of the lemon, making sure not to cut too much of the lemon, just the skin. This will make it easier for your blender to get an even consistency. Then, using the tip of a spoon, scratch off the skin of the ginger root. If you prefer, you can also cut off the skin using a paring knife. Next, add the ginger, lemon, and honey into a blender.
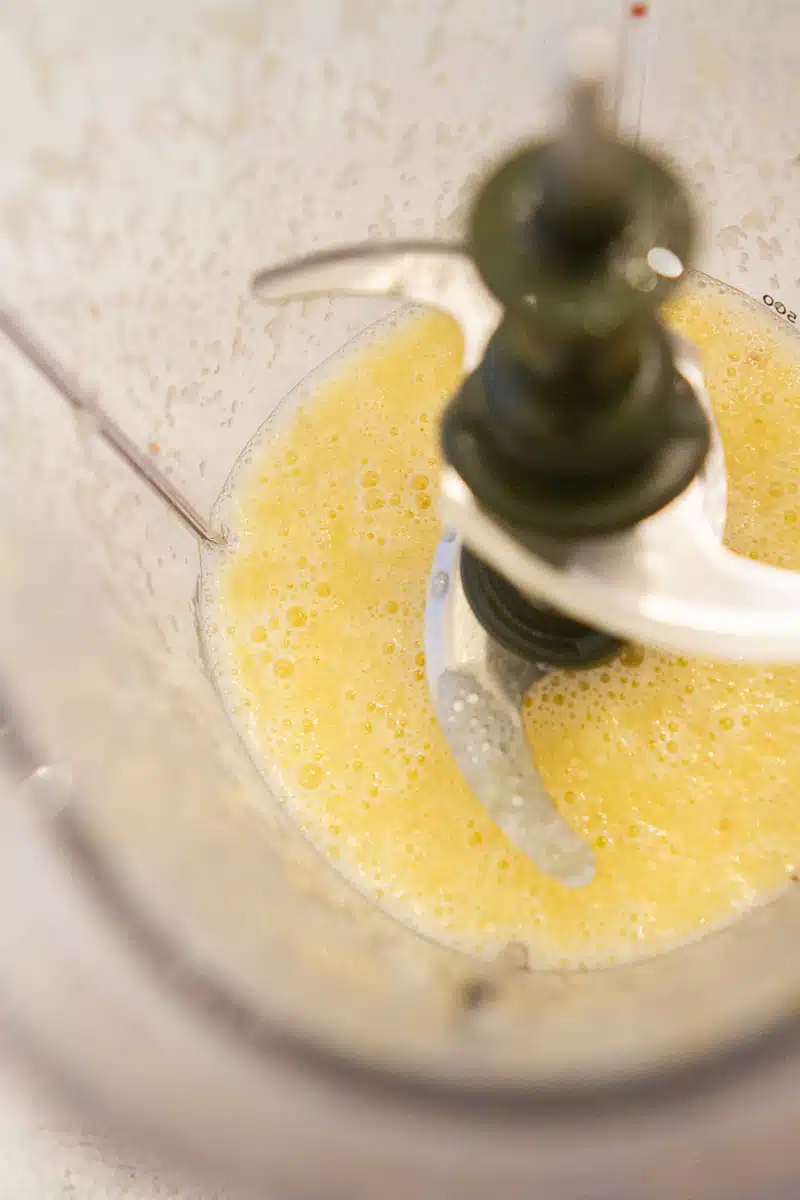
- Step 2: Blend
- Turn on the blender at high speed until all the ingredients are processed and smooth. Feel free to do a taste test at this point and adjust to your preference if you want more of a kick, add more ginger if you need a little more sweetness, add in some more honey.
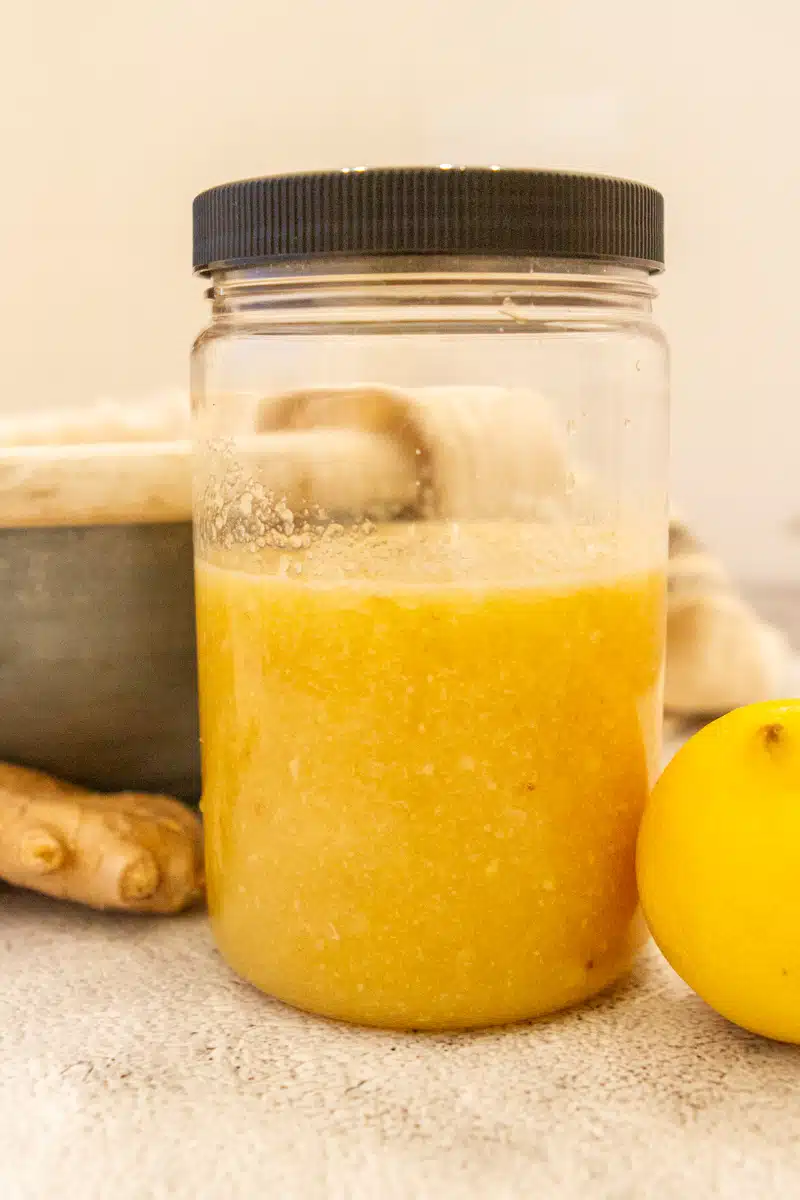
- Step 3: Store your tea concentrate
- Prepare a glass jar by either sterilizing or washing it with soap in hot water, making sure it's clean and won't promote rotting. Pour in your blended lemon, ginger, honey concentrate and cover with a lid, and store in the refrigerator.

- Step 4: Brew some tea
- When you are ready to enjoy some soothing tea. Boil water into a 6 oz tea cup and let it slightly cool then add about 3-4 tablespoon of the concentrate, give the tea about 5 minutes to brew, and then enjoy the soothing benefits.
Substitutions and Variations
Sweetener-Free: Skip the honey if you prefer an unsweetened tea or don't want added sugars.
Plant-Based Sweetener: Use agave instead of honey for a vegan option.
Add a Kick: Include a pinch of cayenne pepper for a spicy twist.
Herbal Touch: Add a few fresh mint leaves for a refreshing note.
Storage Tips
The lemon juice in this Lemon ginger tea concentrate acts as a natural preservative. I have kept it in the fridge for more than a week and it did not spoil.
If you would like to store it for a longer period then pour the concentrate into an ice mold and freeze it until the lemon ginger is solid then store it in a freezer zip bag until ready to use. Then just pop one or two cubes into boiling water and enjoy just as the fresh one.

Top Tip
For maximum flavor and health benefits, use fresh, high-quality ingredients. Organic ginger and lemons are ideal to ensure you’re not consuming any unwanted pesticides or chemicals.
FAQ
Yes! Use ½ teaspoon of powdered ginger as a substitute. However, fresh ginger provides a more vibrant flavor and additional nutrients.
Absolutely! This tea is a natural, caffeine-free beverage you can enjoy daily to support your immune system and overall wellness.
Ginger lemon tea can be enjoyed any time of day just remember ginger does make you feel more alert. So, if you are sensitive to such things, I would watch if ginger will keep you awake if enjoyed too close to bedtime.
Other recipes you might enjoy
Looking for other recipes like this? Try these:
If you enjoyed this recipe make sure to leave a 5-star rating. As well as leave a comment if you have any questions or what you enjoyed most. Be sure to tag us on social media #juliesapron or @juliesapron for a chance to be featured on our page. These small gestures mean so much for the success of my blog! Thank you for following along and if you are new here, welcome; I hope you stick around and enjoy all the recipes!

Lemon Ginger Honey Tea
Equipment
- 1 blender
- 1 Cutting Board
- 1 knife
- 16 oz glass jar
Ingredients
- 3 medium Organic lemons
- 8-10 inches Organic Ginger root
- 1.5-2 cups Raw local honey
Instructions
- Using a sharp knife, cut off the skin of the lemon, making sure not to cut too much of the lemon, just the skin. This will make it easier for your blender to get an even consistency. Then, using the tip of a spoon, scratch off the skin of the ginger root. If you prefer, you can also cut off the skin using a paring knife. Next, add the ginger, lemon, and honey into a blender.

- Turn on the blender at high speed until all the ingredients are processed and smooth. Feel free to do a taste test at this point and adjust to your preference if you want more of a kick, add more ginger if you need a little more sweetness, add in some more honey.

- Prepare a glass jar by either sterilizing or washing it with soap in hot water, making sure it's clean and won't promote rotting. Pour in your blended lemon, ginger, honey concentrate and cover with a lid, and store in the refrigerator.

- When you are ready to enjoy some soothing tea. Boil water into a 6 oz tea cup, let slightly cool and add about 3-4 tablespoon of the concentrate, give the tea about 5 minutes to brew, and then enjoy the soothing benefits.

Notes
Storage Recommendation:
The lemon juice in this Lemon ginger tea concentrate acts as a natural preservative. I have kept it in the fridge for more than a week and it did not spoil. If you would like to store it for a longer period then pour the concentrate into an ice mold and freeze it until the lemon ginger is solid then store it in a freezer zip bag until ready to use. Then just pop one or two cubes into boiling water and enjoy just as the fresh one.The post LEMON GINGER HONEY TEA appeared first on Julies Apron.
]]>The post GRIDDLE SMASH BURGER appeared first on Julies Apron.
]]>
This post may contain affiliate links. Please read my disclosure policy here.
[feast_advanced_jump_to]Ingredients

- Ground Beef
- Egg
- Steak Seasoning
- Cheese
- Onion
- Burger Buns
- Creamy Burger Sauce
See recipe card for quantities.
Substitutions and Variations:
- Ground Meat: If you prefer, you can use ground turkey, chicken, or even pork.
- Cheese: Experiment with different types of cheese such as cheddar, Swiss, pepper jack, blue cheese, or even a cheese sauce.
- Toppings: Don't limit yourself to traditional toppings. Considersautéed mushrooms, bacon, fried eggs, or even pineapple slices for a unique twist.
- Burger Buns: Instead of traditional burger buns, you can use lettuce wraps, ciabatta bread, pretzel buns, or even grilled portobello mushrooms for a low-carb option.
- Seasonings: Experiment with different seasonings in the meat mixture or keep it simple with just salt and pepper.
Feel free to experiment with this method of making Smashed Burgers. Try Stuffed Burgers, Spicy Smash Burger, Breakfast Smash Burger, or Mini Smash Burger Sliders.

GRIDDLE SMASH BURGER
Equipment
- 1 griddle
- 1 mixing bowl
- 1 knife
Ingredients
Smash burgers:
- 1 lbs ground beef
- 1 large egg
- 2-3 tablespoon steak seasoning
- 4 slices cheese
- 1 large yellow onion
Creamy Burger Sauce:
- ½ cup mayonaise
- 2 tablespoon relish
- 4 tablespoon sweet onion grated
- 2 tsp honey mustard
- ½ teaspoon white vinegar
- ½ teaspoon smoked paprika
- 2 cloves garlic
- ¼ teaspoon sea salt
Other Burger Ingredients:
- 4 Burger Buns
- 4 leaves lettuce
- 1 avocado mashed or sliced
- 1 large beefsteak tomato
Instructions
- Preheat Your Griddle: Place griddle over medium-high heat. You want it to be hot when you start cooking the burgers. Drizzle with olive oil.
- Season the Patties: Season 1lb of ground beef with 2 tablespoon of steak seasoning. You can add additional seasonings if desired. Then add in 1 egg and mix until the beef holds shape.

- Divide and Shape the Patties: Divide the ground beef into evenly sized portions, typically around 4 pieces. Shape each portion into a ball. Don't pack the meat too tightly; you want it to be loosely formed.

- Caramelize onion: Cut onion in half and then into slices then on the preheated griddle sautéed onion slices until caramelized and translucent. Set aside in a bowl.

- Cook the Patties: Place one ground beef patty onto the hot surface. Using a sturdy spatula, press down firmly on the meatball to flatten it into a thin patty. Pressing down will create those crispy edges that Smash Burgers are known for. Cook for about 2-3 minutes without disturbing to allow the crust to form. Then add onto a tablespoon of the caramelized onions and then flip the patty and press down firmly again. Pressing the onions into the beef.

- Flip and Add Cheese (Optional): After 2-3 minutes, flip the patties. If you're adding cheese, place a slice on top of each patty immediately after flipping. Turn off the heat on the griddle and let the cheese melt on the burger patties. Feel free to add cheese while assembling the burger instead.

- Assemble and serve the Griddle Smash Burgers: Remove the patties from the skillet or griddle and place them onto the bottom half of the toasted burger buns. Add your desired toppings and creamy burger sauce. Place the top half of the burger buns on each burger and serve immediately while they're still hot and crispy.

Notes
Recipe Substitutions and Variations:
-
- Ground Meat: If you prefer, you can use ground turkey, chicken, or even pork.
-
- Cheese: Experiment with different types of cheese such as cheddar, Swiss, pepper jack, blue cheese, or even a cheese sauce.
-
- Toppings: Don't limit yourself to traditional toppings. Considersautéed mushrooms, bacon, fried eggs, or even pineapple slices for a unique twist.
-
- Burger Buns: Instead of traditional burger buns, you can use lettuce wraps, ciabatta bread, pretzel buns, or even grilled portobello mushrooms for a low-carb option.
-
- Seasonings: Experiment with different seasonings in the meat mixture or keep it simple with just salt and pepper.

Storage Recommendations
These Griddle Smash Burgers are best enjoyed fresh. If you want to make the patties ahead of time and then reheat and assemble the burgers before enjoying them. Store in the refrigerator in an airtight container for up to 2 days.
You can form the ground beef patties and freeze them by placing parchment paper between each patty and freeze for up to 3 months.
Top tip
Don't flip too soon! Let the patties cook undisturbed for a couple of minutes after smashing to allow the crust to form. Flipping too soon can cause the patties to fall apart or lose their crispy exterior.
Related Recipes
Looking for other recipes like this? Try these:
If you enjoyed this recipe make sure to leave a 5-star rating. As well as leave a comment if you have any questions or what you enjoyed most. Be sure to tag us on social media #juliesapron or @juliesapron for a chance to be featured on our page. These small gestures mean so much for the success of my blog! Thank you for following along and if you are new here, welcome; I hope you stick around and enjoy all the recipes!
The post GRIDDLE SMASH BURGER appeared first on Julies Apron.
]]>The post RUSTIC WHOLE WHEAT SOURDOUGH BREAD RECIPE appeared first on Julies Apron.
]]>
Frequently Asked Questions about Sourdough
What is the best flour for sourdough?
- King Arthur Organic Bread Flour
- Costco Organic unbleached All Purpose Flour- This is the one I use most often
- Bobs Red Mill All Purpose Flour
Most Important is to use good quality and high protein flour. Whole wheat flour is a really great flour that is nutrient-rich and feeds the microbiome in your starter to keep it alive and healthy.
Should sourdough bread be made in a dutch oven?
Most of us do not have fancy domed bread cloche or a steam oven but most of us do have a Dutch oven. Using a lidded Dutch oven to bake your sourdough can replicate the conditions needed to bake the perfect sourdough loaf.
High heat and Steam are essential for sourdough.
A Dutch oven or cast iron pot with a lid can handle high temperatures that regular pots are unable to. Making it perfect for bread making swell as other delicious Dutch oven recipes.
Steam is what makes sourdough have an airy crumb and crispy crust. Steam inside the loaf helps it cook evenly and rise perfectly without burning the crust.
How to keep the bottom of your sourdough from Burning?
The methods I have tried and which worked and which didn't. The first method is rice under the parchment paper and bread. I don't prefer this as it wastes a lot of rice as it burns and you need to replace it each time. Unless you have a lot of rice that went bad or is unusable. The second is Foil under the parchment and bread. This method didn't work for me I still got a burnt bottom. Lastly my favorite fail-proof method is placing a baking sheet in the oven rack under the Dutch oven. The baking sheet breaks the heat from the bottom of the Dutch oven which then prevents burning.

RUSTIC WHOLE WHEAT SOURDOUGH BREAD RECIPE
Equipment
- 2 Proofing baskets
- 1 lame
- 1 Bread knife or Serrated knife
- 2 shower caps
- 1 Large mixing bowl glass
Ingredients
Feed Sourdough Starter:
- 120 ml warm filtered water
- ¾ cup organic all-purpose flour
Whole wheat Sourdough Dough:
- 250 ml active sourdough starter
- 700 ml warm filtered water
- 1 tbsp sea salt
- 1 tablespoon organic sugar
- 3 cups whole wheat flour
- 3 cups organic all-purpose or bread flour
- 1 tablespoon flax seeds
- 1 tablespoon hemp seeds
- 1 tablespoon chia seeds
- 1 tablespoon sunflower seeds
Instructions
Feeding sourdough starter:
- To feed your starter add 120ml of warm filtered water making sure it is just slightly warm if it is too hot let the water cool off as hot water can kill the starter. Also, add in ¾ cup of flour then mix it should be fairly thick like dough.

- Cover and let sit on the counter at room temperature until it has doubled and you can see bubbles forming in the starter. This process can take from 3 to 8 hours depending on your starter and the temperature of your home.
Mixing Whole Wheat Sourdough dough:
- Once your starter has been fed and is active you are ready to mix the dough. In a large glass bowl, add 700ml of warm filtered water and to it add 250ml of your active starter. If your starter is floating it is ready and active if it sinks your bread will not rise so feed your starter again and wait until it's bubbly.

- Next, add 1 heaping tablespoon of sea salt and 1 tablespoon of sugar. With a Danish whisk mix the ingredients and start adding flour 1 cup at a time up to 3 cups of whole wheat flour and 3 cups of organic all-purpose flour. Next, add in all the seeds 1 tablespoon of each flax seeds, hemp seeds, chia seeds, and sunflower seeds. It's ok if the dough still looks a little lumpy at this point with each fold it will get better with each fold.

- Cover the bowl with dough with either a shower cap or plastic wrap and let sit for 30 minutes.
Stretching and folding Sourdough:
- After 30 minutes take off the shower cap and wet your hands with water then working from the edge of the bowl pull the dough up which stretches the dough and fold it over to the other side of the bowl. Working around the bowl you will notice the dough stiffen a little this shows that you are doing a good job strengthening the dough!
- Cover again with the shower cap and let sit again for 30 minutes. Repeat this for 5-6 times leaving the dough to rest on the counter for 30 minutes every time.
Final stretch and forming sourdough:
- On the 6th time of strengthening your dough invert the dough onto a floured surface and split the dough into 2 even pieces. Take one of the pieces and slowly start stretching on the counter first side to side then up and down and stretch as far as possible without ripping the dough. It is ok if it rips but you are stretching too quickly. After the dough is stretched fold the top to the center and the bottom up to the center as well next roll up from one side to the other and with 2 hands cupped slowly roll it down the surface which will form the bread and create tension on the top to develop that beautiful ear on your cut.

- Coat the bread with flour and slowly flip the smooth floured side into a proofing basket. If needed pinch the bottom closed and sprinkle with some more flour and cover with a shower cap. Place in the refrigerator overnight or 8 hours to ferment.
- **If you prefer sour flavor in your sourdough then leave it on the counter to ferment for 6-8 hours before forming and then form as stated above and place in the refrigerator for 3-4 hours.
- Preheat your oven to 450F and place your Dutch oven with the lid to preheat in the oven for about 30 minutes. Once your oven and Dutch oven are preheated take out the proofing basket with the sourdough and invert it onto a piece of parchment paper.
- Coat the top with more flour and use a lame to make a large cut and score a design. It is important to make a deep cut across your bread if you don't the bread will end up bursting in random places. Cut at an angle to develop the ear on the bread and have that nice curl.
- With oven hits remove the hot Dutch oven out of the oven and slowly place the sourdough into the Dutch oven with the parchment paper. Cover back with the lid and place back into the hot oven leave to bake for 30 minutes. After 30 minutes remove the lid and let the bread finish baking for about 20-30 minutes depending on how dark you want your crust.
- After the Sourdough is done baking remove it place it on a cooling rack and let it cool to room temperature before cutting into it.

Recipe Substitutions and Variations
- Sea salt- I also really enjoy using Celtic salt for the added minerals.
- Flour- It is best to use a good quality flour that is high in protein. I enjoy using the Costco Organic Flour.
- Filtered water- If you do not have filtered water you can bring a pot or kettle of water to a boil and then let cool. It will help evaporate most of the chlorine and such.
- Seeds- Feel free to mix in other seeds or leave out ones that you don't like.
Get creative with the scoring on your bread the more you practice the better your designs will come out. But to get a precise cut use a new razor blade every 3 times or so. These blades are very thin and get dull quickly.
If you prefer to see those little bubbles on the crust then instead of adding flour use a spray bottle spray the uncooked sourdough with filtered water and then bake as described.
SOURDOUGH TROUBLE SHOOTING:
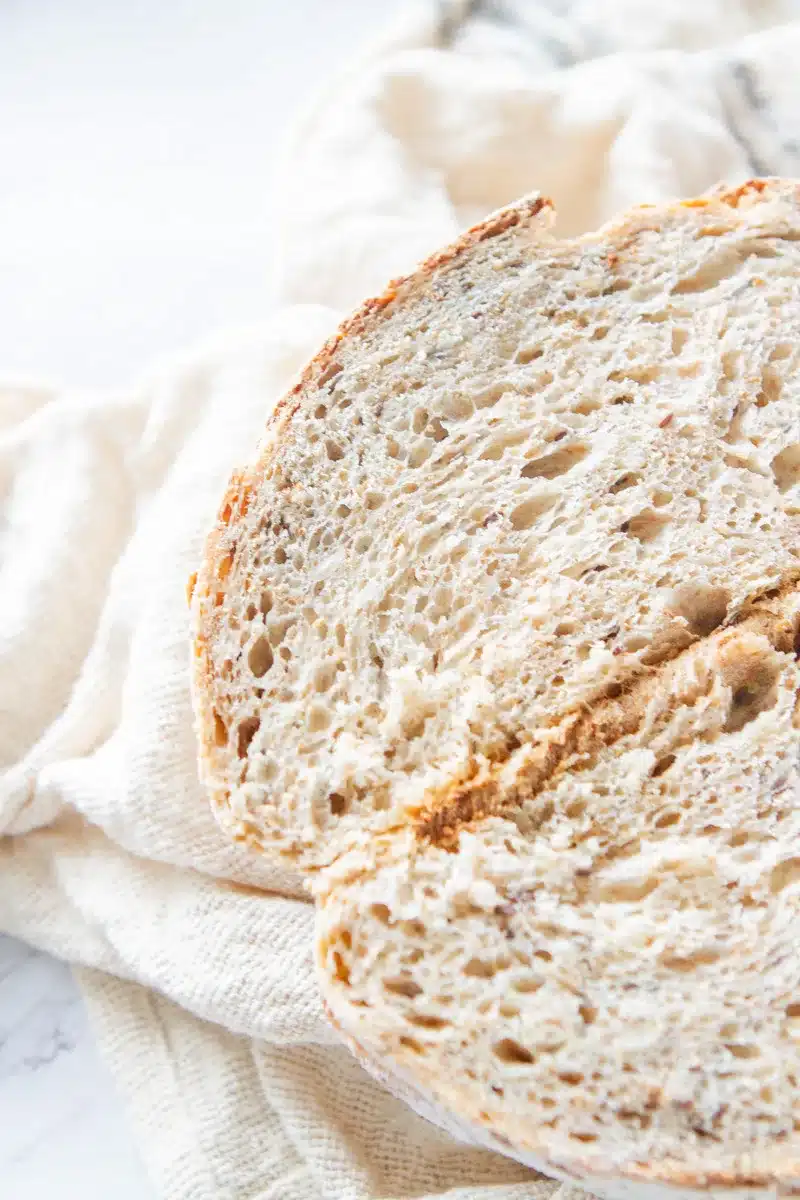
WHY IS MY SOURDOUGH BREAD GUMMY INSIDE?
Either it is underbaked or it was cut into before completely cooled off.
HOW TO MAKE SOURDOUGH LESS SOUR?
Minimize fermentation at room temperature and do a cool bread-proofing in the refrigerator.
SOURDOUGH STARTER NOT RISING...
Either the room was too cold or the water was too cold when feeding the starter. You can help the sourdough rise by adding a tablespoon of warm water and 1 tablespoon of flour.
SOURDOUGH STARTER NOT BUBBLY...
Needs to be strengthened feed once more with the same amounts as the recipe states.
SOURDOUGH STARTER NOT FLOATING...
It is not active either didn't have enough time to activate or the starter needs to be strengthened with a few more feedings. Feed once a day until you will start seeing bubbles form and starter rising.
HOW TO GET SOURDOUGH MORE SOUR?
Let ferment at room temperature longer usually, it is done overnight you can bump it up to 12- 16 hours fermentation time at room temperature.

HOW TO STORE SOURDOUGH BREAD
Store your bread in either a linen bag or bread box or I prefer a cake stand with a dome that way you can display your hard work! It is best if there is a little air flow to keep the crust crispy. Fresh bread is good for about a week on the counter at room temperature. Feel free to store it in the refrigerator for a prolonged shelf life. Or place in a gallon freezer bag and freeze for up to 3 months. Make sure to remove as much air as possible from the bag.
Make these sandwiches using this Whole Wheat Sourdough
The post RUSTIC WHOLE WHEAT SOURDOUGH BREAD RECIPE appeared first on Julies Apron.
]]>The post CRISPY CHICKEN RANCH SNACK WRAP appeared first on Julies Apron.
]]>
This post may contain affiliate links. Please read my disclosure policy here.
Why you will love this recipe
- Satisfying Crunch: The crispy chicken provides a delightful crunch with every bite, adding a satisfying texture to your snack experience.
- Flavorful: Seasoned to perfection, the chicken offers a burst of flavor that complements the cool and creamy ranch dressing. This combination creates a mouthwatering taste sensation.
- Quick and Easy: The recipe is simple and quick to make, perfect for those busy days when you want a delicious snack without spending too much time in the kitchen.
- Portable: Ideal for on-the-go snacking, the wrap is neatly wrapped, making it easy to hold and eat without creating a mess. It's a convenient option for lunches, picnics, or whenever you need a tasty snack while out and about.
Ingredients you will need

See recipe card for quantities.
Substitutions and Variations
- Lettuce - Iceberg lettuce will also work well in this recipe instead of romaine lettuce.
- Tortillas- Try whole wheat tortillas or veggie wrap for a healthier option.
- Ranch- Try out other sauces such as honey mustard or BBQ.
Load it up with Veggies! Make this chicken snack wrap more nutritious by adding in tomatoes, onions, avocado etc.
Step by step Instructions

Step 1: Bake Chicken Bites:
I like to use the Just Bare chicken nuggets from Costco. I typically have them on hand anyway so this makes making these ranch-crispy chicken wraps simple. The instructions are on the package which for these was 375F for 23 minutes.

Step 2: Cook Tortillas:
This recipe for Sourdough discard Tortillas will make it so simple for you to make tortillas in no time at all. Store-bought will also work well in this recipe.

Step 3: Assemble the Ranch Snack Wrap:
Prep the remaining ingredients chop the romaine lettuce and shred the cheddar cheese. Then onto the tortilla place 3-4 chicken bites if using chicken strips then 1 or 2 pieces depending on size. Top with some cheddar cheese, lettuce, and drizzle with ranch. Enjoy warm!
Equipment Recommendation

Storage Suggestion
This Crispy Chicken Ranch Snack Wrap is best enjoyed fresh. However, the components maybe prepped ahead and stored separately.
Baked chicken nuggets are good in the refrigerator for a week in an airtight container.
Chopped lettuce can be stored in an airtight container with a paper towel lining the bottom for 3 days or until it starts to brown.
Top tip
To get extra crispy chicken, allow the cooked chicken to cool for a few minutes before assembling the wrap. This helps prevent the steam from the hot chicken from making the tortilla soggy. Also, you can place a layer of lettuce between the chicken and the tortilla to act as a barrier, maintaining the crispiness of the chicken while adding an extra layer of flavor and texture to the wrap.

Related
Looking for other recipes like this? Try these:
If you enjoyed this recipe make sure to leave a 5-star rating. As well as leave a comment if you have any questions or what you enjoyed most. Be sure to tag us on social media #juliesapron or @juliesapron for a chance to be featured on our page. These small gestures mean so much for the success of my blog! Thank you for following along and if you are new here, welcome; I hope you stick around and enjoy all the recipes!

Crispy Chicken Ranch Snack Wrap
Equipment
- 1 skillet
- 1 Chopping board
- 1 box grater
- 1 Sharp Knife
- 1 baking sheet
Ingredients
- 4 Sourdough discard Tortillas
- 16 pieces chicken nuggets
- 4 tablespoon Ranch dressing
- 1 cup romaine lettuce
- ½ cup cheddar cheese
Instructions
- I like to use the Just Bare chicken nuggets from Costco. I typically have them on hand anyway so this makes making these ranch-crispy chicken wraps simple. The instructions are on the package which for these was 375F for 23 minutes.
- This recipe for Sourdough discard Tortillas will make it so simple for you to make tortillas in no time at all. Store-bought will also work well in this recipe.
- Prep the remaining ingredients chop the romaine lettuce and shred the cheddar cheese. Then onto the tortilla place 3-4 chicken bites if using chicken strips then 1 or 2 pieces depending on size. Top with some cheddar cheese, lettuce, and drizzle with ranch. Enjoy warm!
Notes
Substitutions and Variations:
-
- Lettuce - Iceberg lettuce will also work well in this recipe instead of romaine lettuce.
-
- Tortillas- Try whole wheat tortillas or veggie wrap for a healthier option.
-
- Ranch- Try out other sauces such as honey mustard or BBQ.
The post CRISPY CHICKEN RANCH SNACK WRAP appeared first on Julies Apron.
]]>The post SOURDOUGH DISCARD TORTILLA RECIPE appeared first on Julies Apron.
]]>
This post may contain affiliate links. Please read my disclosure policy here.
Why you will love our Sourdough Flour Tortillas
- Versatile: Whether you're craving tacos, quesadillas, enchiladas, or simply need a wrap for your lunchtime sandwich, these sourdough discard tortillas are incredibly versatile, making them a pantry staple you'll reach for time and time again.
- Simple Ingredients: With just a handful of basic ingredients, including flour, water, salt, and of course, sourdough discard, this recipe proves that you don't need a long list of ingredients to create something truly delicious.
- Sustainable: By using up sourdough discard that might otherwise go to waste, reducing your food waste one tortilla at a time.
- Homemade Satisfaction: There's something incredibly satisfying about making your tortillas from scratch. Plus, the aroma of freshly cooked tortillas wafting through your kitchen is simply irresistible.
Ingredients you will need
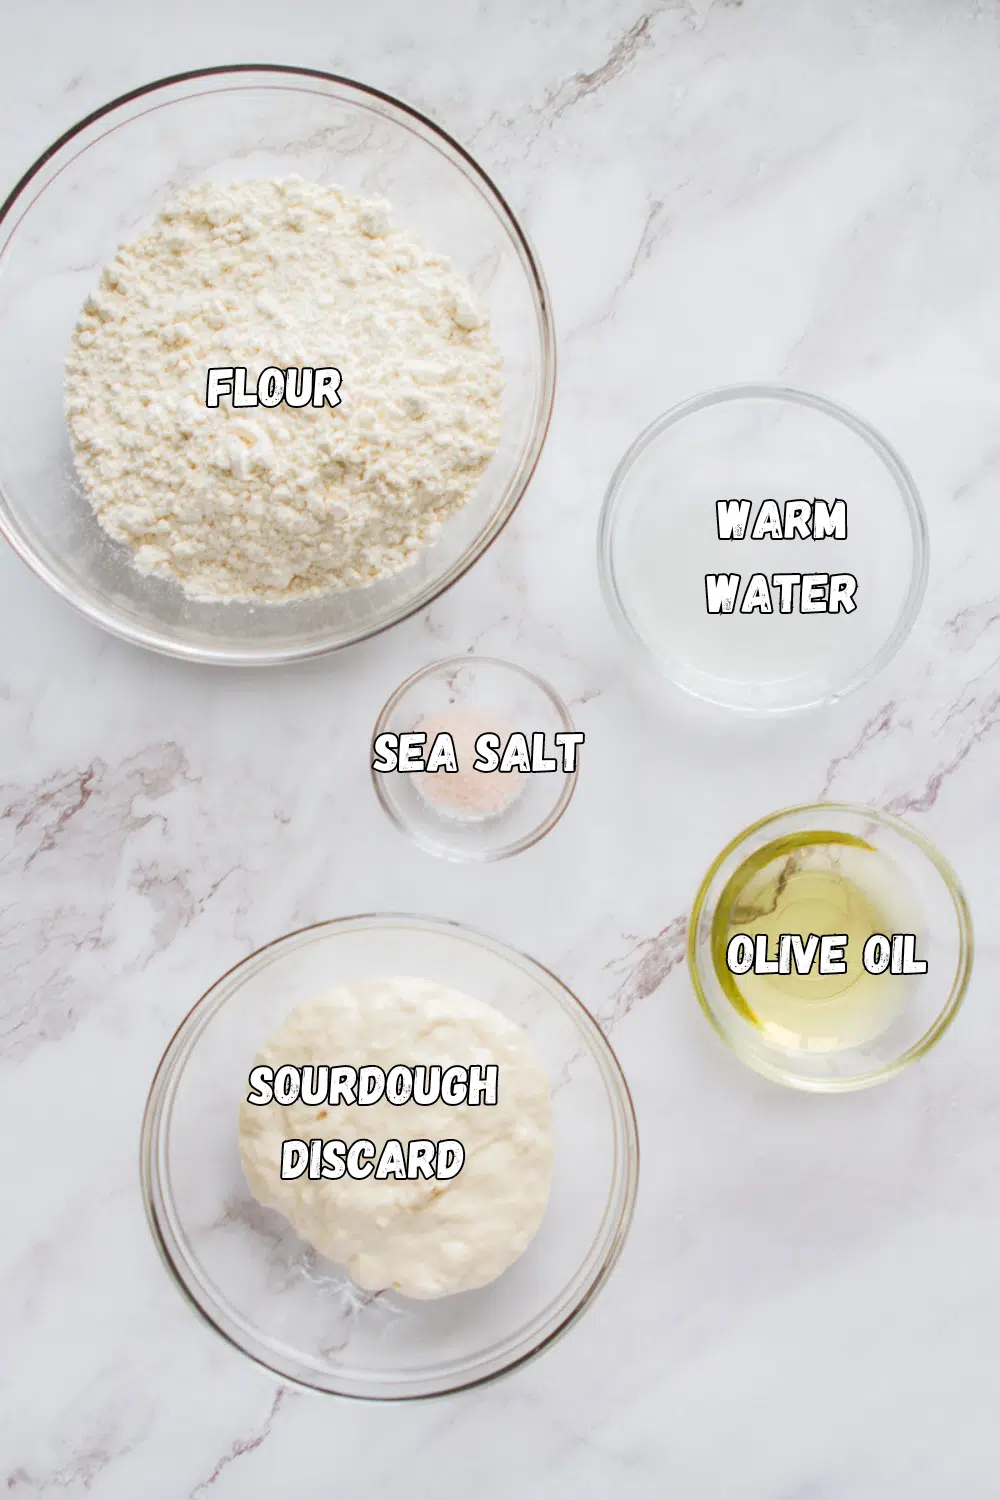
- Sourdough discard
- olive oil
- warm water
- flour
- sea salt
See recipe card for quantities.
Recipe Substitutions and Variations
- Flour- I prefer Organic flour, feel free to substitute with bread flour or gluten flour.
- Olive oil- you can use any light flavor oil.
These Sourdough tortillas can be used for tacos, enchiladas, or wraps.
Step by Step Instructions
Step 1: Make the Sourdough Tortilla Dough
In a large glass bowl add ⅔ cups of warm water, ⅔ cups sourdough discard, ¼ cup oil, 1 teaspoon salt, and 1 ¾ cups of flour. Knead 2-5 minutes the ingredients together until dough comes together. Cover with a damp paper towel and cover with plastic wrap let sit for 30 minutes.
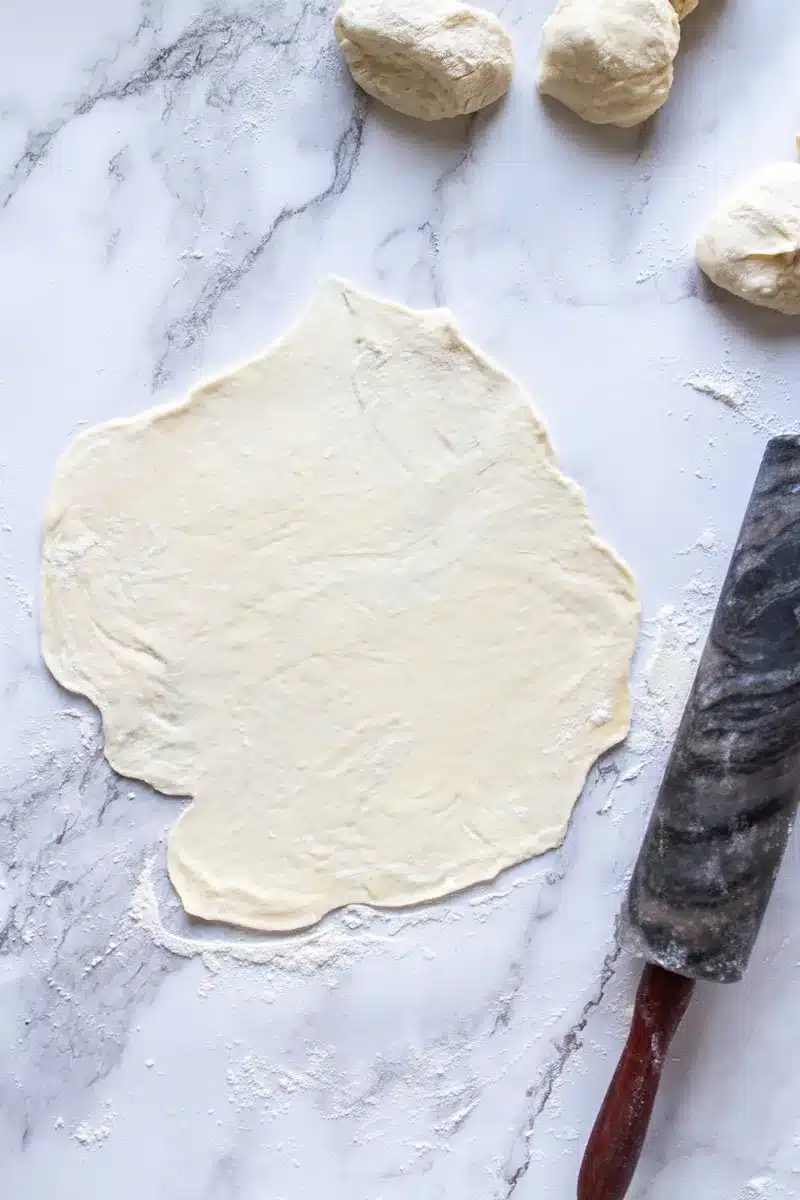
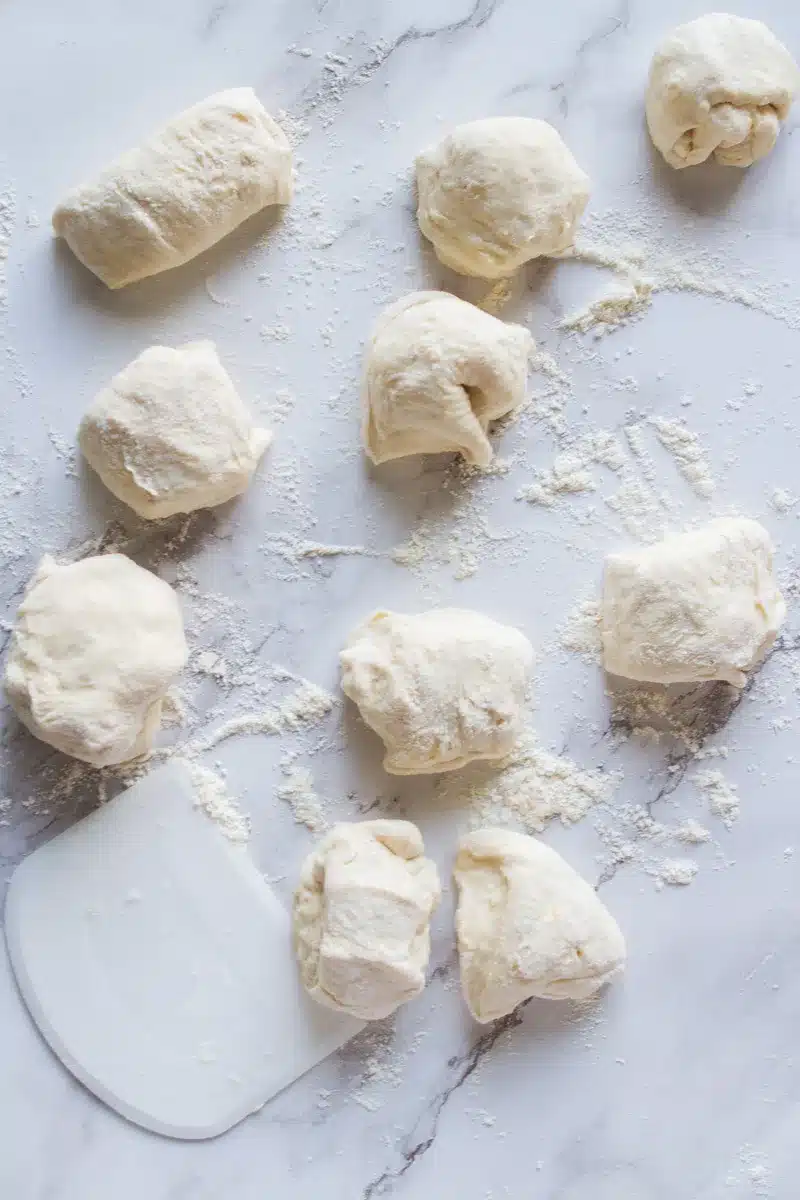
Step 2: How to roll out Tortillas
Separate dough into 8-10 even pieces. Then flour a counter surface and with a rolling pin roll out into a thin circle or you can use a tortilla press.
Step 3: Cook Tortillas
Heat a skillet preferably heavy bottom or cast iron on medium heat. Drizzle some oil or butter place the dough tortilla and cook until golden and flip to the other side about 2-3 minutes per side.

How to Store Tortillas
Tortillas are best stored in an airtight container or a reusable bag for uptown 2 days at room temperature. Store in the refrigerator for 7-10 days in an airtight bag. Also, you can freeze for up to a year. If you would like to take out a tortilla at a time then line with parchment paper in-between each tortilla.
Equipment Recommendation

Top tip
Wrap the cooked tortillas in a linen towel while cooking this will help make the tortillas flexible and keep them warm longer.
If you enjoyed this recipe make sure to leave a 5-star rating. As well as leave a comment if you have any questions or what you enjoyed most. Be sure to tag us on social media #juliesapron or @juliesapron for a chance to be featured on our page. These small gestures mean so much for the success of my blog! Thank you for following along and if you are new here, welcome; I hope you stick around and enjoy all the recipes!

SOURDOUGH DISCARD TORTILLA
Equipment
- 1 cast iron skillet
- 1 tortilla press
- 1 Large bowl
Ingredients
- ⅔ cups sourdough starter discard
- ¼ cup light tasting olive oil
- ⅔ cup warm filtered water
- 1 ¾ cup Flour good quality
- 1 teaspoon sea salt
Instructions
- In a large glass bowl add ⅔ cups of warm water, ⅔ cups sourdough discard, ¼ cup oil, 1 teaspoon salt, and 1 ¾ cups of flour.

- Knead 2-5 minutes the ingredients together until dough comes together. Cover with a damp paper towel and cover with plastic wrap let sit for 30 minutes.

- Separate dough into 8-10 even pieces. Then flour a counter surface and with a rolling pin roll out into a thin circle or you can use a tortilla press.
- Heat a skillet preferably heavy bottom or cast iron on medium heat. Drizzle some oil or butter place the dough tortilla and cook until golden and flip to the other side about 2-3 minutes per side.

Notes
Storage Recommendation:
Tortillas are best stored in an airtight container or a reusable bag for uptown 2 days at room temperature. Store in the refrigerator for 7-10 days in an airtight bag. Also, you can freeze for up to a year. If you would like to take out a tortilla at a time then line with parchment paper in-between each tortilla.The post SOURDOUGH DISCARD TORTILLA RECIPE appeared first on Julies Apron.
]]>